
UX / UI Web Design in Figma | Advanced Level | Eng
Master Advanced UI/UX Web Design in Figma and Create Professional Responsive Websites
Lo que serás capaz de hacer
I’m excited to invite you to the course “Web Design in Figma — Advanced Level” — an in-depth, practical program dedicated to modern web design, visual style, and the principles professionals use to create websites. Here we don’t talk about Figma buttons — we focus on modern design rules. On how to make your work visually strong, logically structured, and truly contemporary. A complete deep dive into web-design principles You will explore dozens of rules and approaches used by professional web designers, including: typography and text hierarchy grids and guides composition and modularity working with color, contrast, and accents spacing, rhythm, and visual order in a layout shadows, rounding, effects, and consistency and much more You will learn to understand why a layout looks good or bad and explain logically what needs to be improved. Modern techniques and visual thinking In the course, we explore: how to develop visual taste how to work with references how to create original website concepts how to translate an idea into a visual structure how to avoid clichés and create genuinely creative solutions Beyond design rules, you will also learn: how to apply Midjourney and Adobe Firefly in web design how to use AI to generate styles, ideas, and visual solutions where neural networks help and where they can do harm We talk about AI honestly — without hype — understanding where it really helps and where it doesn’t. The course includes: 100+ video lessons covering concrete design rules an interactive 300+ slide workbook with rules, examples, and diagrams a student workbook with practical exercises exercises, demonstrations, and full breakdowns Every topic is reinforced through practice — you don’t just watch lessons, you gain experience by solving real design tasks. Together we will create 2 major portfolio projects: A creative website for a real client , built in a modern visual style A redesign of an existing website where you apply all the rules you’ve learned You will create the projects independently, using the principles and logic mastered throughout the course. Throughout the course, I answer students’ questions daily on the platform . See you in the lessons!
- Learn to create modern and stylish website layouts
- Study the ten rules of modern web design
- Learn to apply web-design principles in practice on real tasks
- Learn to build grids and guides for structuring layouts
- Learn to set spacing, rhythm, and visual order in a layout
- Study methods of working with typography
Temario
UNIDAD 1 - Введение · 5 leccionesUNIDAD 1 - Введение
UNIDAD 1 - Введение
- What the course is about
- Download the course materials
- This is a multilingual course
- How to go through the course
- How to ask questions
UNIDAD 2 - Typography · 10 leccionesUNIDAD 2 - Typography
UNIDAD 2 - Typography
- Consistency is the most important thing
- The very first UX/UI in the world
- Proper text settings in web design
- Types of fonts
- How to choose a font for a project
- How to format text creatively
- How to format text in Figma
- Practice #1 — Format text beautifully
- What glyphs are
- Summary of the section
UNIDAD 3 - Visual Taste & Inspiration · 5 leccionesUNIDAD 3 - Visual Taste & Inspiration
UNIDAD 3 - Visual Taste & Inspiration
- The designer’s dilemma
- Resources for developing visual taste
- Plugins for visual inspiration
- Website design styles
- Use AI to develop visual taste
UNIDAD 4 - Grids & Guides · 7 leccionesUNIDAD 4 - Grids & Guides
UNIDAD 4 - Grids & Guides
- Types of grids
- Create an uncomfortable grid
- Analyze other designers’ grids
- Summary — Typography & grids
- Practice #2 — Place content inside a grid
- Practice #2 — Completed (Part 1)
- Practice #2 — Completed (Part 2)
UNIDAD 5 - First Project · 15 leccionesUNIDAD 5 - First Project
UNIDAD 5 - First Project
- Project task and description
- Additional note — Where to get photos
- Creating a modular grid
- Creating the Hero Section, Part 1
- Creating the Hero Section, Part 2
- Creating the second section of the website
- Creating the third section of the website
- Creating the first banner
- Creating the fourth section of the website
- Creating the second banner
- Creating the fifth section
- Creating the sixth section
- Creating the website footer
- Changing the font and creating the navigation menu
- Finishing the website
UNIDAD 6 - Spacing · 3 leccionesUNIDAD 6 - Spacing
UNIDAD 6 - Spacing
- The right-angle rule
- Which spacing values to use
- Using empty space in design
UNIDAD 7 - Visual Hierarchy · 8 leccionesUNIDAD 7 - Visual Hierarchy
UNIDAD 7 - Visual Hierarchy
- What visual hierarchy is
- Levels of visual hierarchy
- Which element is more important
- How to use the color gray
- Do the opposite — Remove accents from unnecessary elements
- Practice #3 — Set up visual hierarchy
- Practice #3 — Completed, Part 1
- Practice #3 — Completed, Part 2
UNIDAD 8 - Borders & Corner Radius · 2 leccionesUNIDAD 8 - Borders & Corner Radius
UNIDAD 8 - Borders & Corner Radius
- What corner rounding should be
- Consistent corner radius
UNIDAD 9 - Color · 14 leccionesUNIDAD 9 - Color
UNIDAD 9 - Color
- The problem with the 60:30:10 approach
- How to create a color scale
- Creating a color scale in practice
- The 60:30:10 rule and the color scale
- You don’t have to use only three colors
- Use system colors
- Use cool or warm gray
- Color associations
- How to use gradients in design
- A couple of tips for working with color
- AI and Color
- Practice #4 — Apply color to the layout
- Practice #4 — Completed, Part 1
- Practice #4 — Completed, Part 2
UNIDAD 10 - Images · 4 leccionesUNIDAD 10 - Images
UNIDAD 10 - Images
- How to place text on images
- What images to use
- How to work with icons
- How to use screenshots in design
UNIDAD 11 - AI in Images · 10 leccionesUNIDAD 11 - AI in Images
UNIDAD 11 - AI in Images
- About AI-generated images
- AI features and pricing
- Removing backgrounds with AI
- Removing objects with AI
- Expanding image boundaries with AI
- Increasing image resolution with AI
- Editing images with AI
- Harmonizing images with AI
- Generating images with AI
- Additional AI capabilities
UNIDAD 12 - Shadows · 3 leccionesUNIDAD 12 - Shadows
UNIDAD 12 - Shadows
- About shadows
- Techniques and methods for working with shadows
- Practice #5 — Applying shadow effects correctly
UNIDAD 13 - Mobile Design · 8 leccionesUNIDAD 13 - Mobile Design
UNIDAD 13 - Mobile Design
- Features of mobile design
- Text size on mobile devices
- Sizes and alignment of elements
- Practice #6 — Adapt your first project
- Practice #6 — Completed, Part 1
- Practice #6 — Completed, Part 2
- Practice #6 — Completed, Part 3
- Practice #6 — Completed, Part 4
UNIDAD 14 - Visual Techniques in Design · 2 leccionesUNIDAD 14 - Visual Techniques in Design
UNIDAD 14 - Visual Techniques in Design
- About visual techniques
- Useful resources for web designers
UNIDAD 15 - Second Project · 12 leccionesUNIDAD 15 - Second Project
UNIDAD 15 - Second Project
- Overview and project goals
- Preparation and reference search
- Creating the Hero Section
- Creating the navigation menu
- Creating decorative lines
- Creating the second section of the website, Part 1
- Creating the second section of the website, Part 2
- Creating the third section of the website
- Creating the fourth section of the website
- Creating a form for the website
- Creating the website footer
- Finalizing the website
Tu certificado lo emite la SEP, no solo una plataforma
Al demostrar la competencia recibes un certificado emitido por la Secretaría de Educación Pública a través del Gobierno del Estado de México: un documento oficial que puedes presentar con confianza ante cualquier empleador o institución.
Tu certificado con INEC
- Lo emite la Secretaría de Educación Pública (SEP), a través del Gobierno del Estado de México
- Documento oficial con folio verificable en línea
- Lo otorga la Universidad Tecnológica Fidel Velázquez
Otras plataformas en línea
- Constancia privada emitida por la misma plataforma
- Solo acredita horas cursadas o asistencia
- Sin respaldo de una autoridad educativa
Tu itinerario, de la inscripción al certificado
- 1
Inscripción con pago único
Pagas $2,800 MXN una sola vez y entras de inmediato al curso.
- 2
Estudias a tu ritmo
15 unidades con videos, lecturas y actividades, disponibles 24/7 durante 12 meses.
- 3
Cuestionarios por unidad
Cuestionarios para comprobar lo aprendido.
- 4
Certificado
Emitido por la SEP a través del Gobierno del Estado de México, con folio verificable.
Un certificado oficial de la SEP
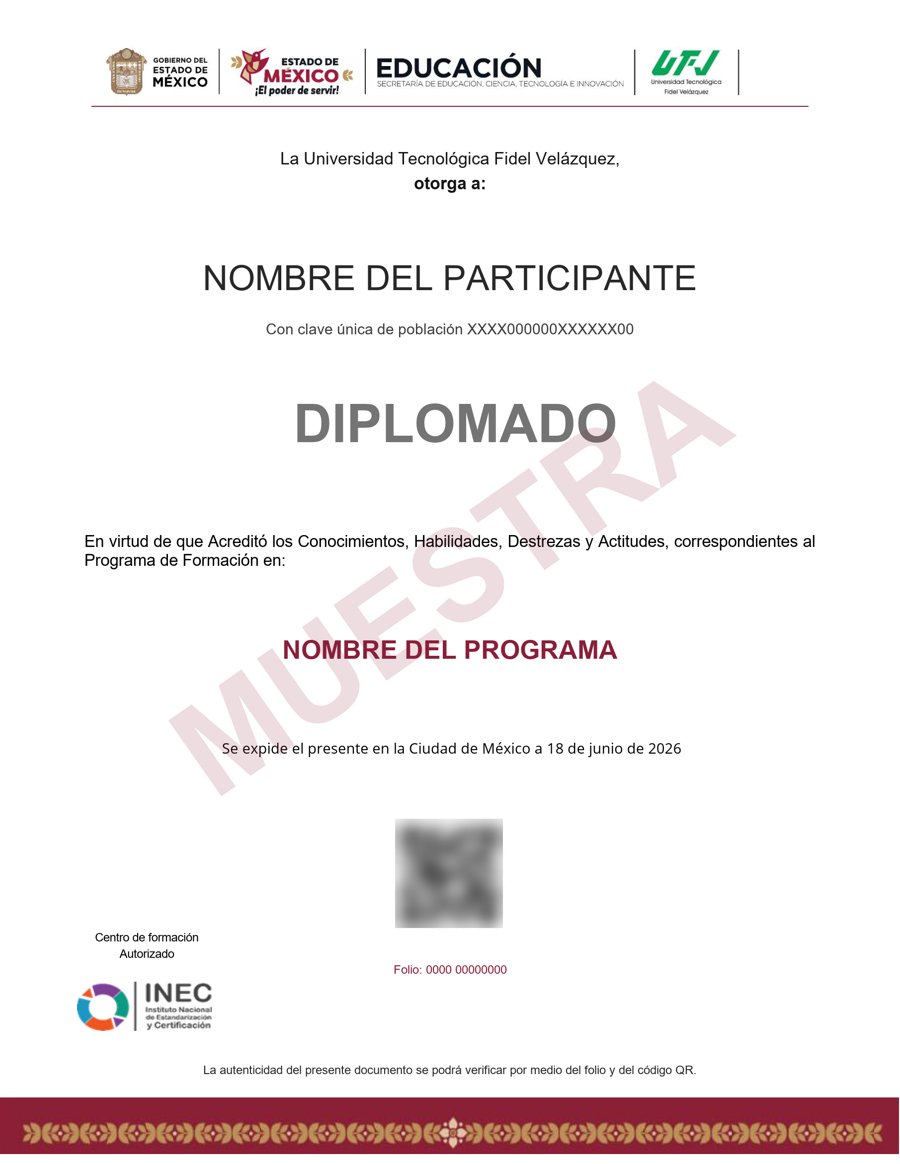
Muestra · verificable por folio y QR
- Emitido por la Secretaría de Educación Pública (SEP), a través del Gobierno del Estado de México. No es una constancia privada: es un documento oficial, y ese respaldo marca la diferencia frente a otras plataformas en línea.
- Contenido impartido por Dmitrii Fokeev.
- Folio y QR verificables para compartirlo con quien te contrate.
Empieza hoy, a tu ritmo
Un solo pago y acceso inmediato al curso completo durante 12 meses.
- 15 unidades · 108 lecciones · 60 h
- 12 meses de acceso
- Certificado emitido por la SEP (Gob. del Estado de México) con folio verificable
Sobre tu inscripción
¿Cómo es el pago?
Un solo pago de $2,800 MXN. No hay mensualidades ni cargos recurrentes.
¿Cuánto tiempo tengo acceso?
12 meses desde tu inscripción, 24/7, para avanzar a tu ritmo.
¿Quién imparte el contenido?
El curso es impartido por Dmitrii Fokeev; INEC gestiona tu inscripción, evaluación y certificado.
¿Qué pasa cuando vence mi acceso?
Puedes renovar tu cuenta tú mismo desde la plataforma, sin trámites ni esperas.

