
TF | URDF | RViz | Gazebo
Understand TFs, Design a custom robot with URDF, Simulate the robot in Gazebo - Your Next Step with ROS2.
Lo que serás capaz de hacer
You have learned ROS2 basics and want to go to the next step? You want to design a custom application for a robot? And maybe also create a simulation for the robot? Or, you are already working on this, but you feel lost with TF, URDF and Gazebo? This course is for you. At the end of the course you will be able to design a custom robot with ROS 2, and run this robot in a simulated world . – Why this course? I have designed myself a ROS application for a custom robot, while working on a startup project. And I started like everybody, as a beginner. Not only learning ROS2 basics was hard, but then when adding TF, URDF, and Gazebo, it seemed impossible . It actually took me a few months/years to really be comfortable with those. When you look at the existing online resources, it’s very hard to find any process that explains in simple terms how to start from scratch and build a project. That’s why I’ve created this course, so you can benefit from my years of experience with ROS. I made the course I wish I had when I got started. My goal is to make you save tons of hours and frustration, by giving you a step by step approach, with a real project that we do together, from beginning to end . – How do I teach? If you’ve taken other ROS 2 courses from me you know that I’m not here to waste your time. My teaching method is quite simple: Step by step Going to the point Learn while doing Also I strongly focus on the “why” behind what you learn. The goal is not just to make you blindly repeat some steps, but to understand why those steps matter . And don’t take my word for it - here are some reviews from fellow students/researchers/engineers/teachers who took my ROS 2 courses on Udemy: “Best course on ROS2 I’ve taken! Other courses (different sites/platforms) made it confusing but this course makes it so clear and easy to understand while letting you try on your own . I am definitely learning a lot in a painless and simple way. I should have gotten this course from the beginning.” - Miguel Martinez G. “Overall very satisfied. I’ve a strong background in programming, but at a higher level (web mostly) and the elegant, fluent and clean approach of this course has leveraged my introduction to the ROS environment in a short amount of time, without the struggle of going through a lot of documentation ” - Devis D. “I think I learned all that I need to develop a ROS2 project from scratch . I will recommend 100% this course to anyone who wants to learn the fundamentals of ROS2.” - Javier D. “This course is awesome. I finally get to understand the development of packages/nodes in a simple progressive way , which helps to understand how the framework works and therefore helps to get into it easily.” - Christophe K. – What will you do and learn in the course? This course is project based . We will start a project together, from scratch. Then, step by step, you will build the application, while learning new concepts. Here’s a quick overview of what you’ll do (non exhaustive list): Understand what TF is (with RViz) and why we need it. Start the project by writing a URDF file, to describe the physical properties of a robot - we’ll start with a mobile robot. Generate TF using the robot state publisher and the URDF. Improve and clean the URDF using the Xacro tool. Adapt the URDF for Gazebo, spawn the robot in Gazebo. Control the robot with Gazebo plugins. Simulate a sensor in Gazebo. Create ROS2 packages and XML launch files to start the entire application with one command line. Everything is hands-on , so you’ll practice right from the start, and I will show you every step that I do. You also get some extra activities during the course, so you can practice even more by being challenged on key points . And there is a big final project, where we create yet another robot (robotic arm) from scratch, using everything that you’ve learned in the course. You will also learn how to combine 2 robots together. So, to go further with ROS 2 and design custom robots and simulations, enroll in the course today! You don’t take any risk here, because you also get a 30-day money back guarantee if you’re not fully satisfied - no questions asked. See you in the course! Note - this course is not for you if: - You know nothing about ROS 2. In this case, I suggest you start with my “ROS 2 for Beginners” course (level 1).
- Understand what TF (TransForm) is and why we need it
- Create a URDF for any robot (ex: mobile base, robotic arm)
- Simulate and control your robot in Gazebo
- Add Links, Joints, Collisions, Inertia tags in the URDF file
- Understand how to correctly specify links and joints origin
- Use Gazebo plugins to simulate the hardware control of the robot
Temario
UNIDAD 1 - Introduction · 6 leccionesUNIDAD 1 - Introduction
UNIDAD 1 - Introduction
- Welcome!
- Course Overview - How to Follow the Course
- Install and setup ROS2 [recap]
- About Gazebo versions
- Note - New extension for VS Code
- Programming tools for this course
UNIDAD 2 - TF (TransForm) Overview · 4 leccionesUNIDAD 2 - TF (TransForm) Overview
UNIDAD 2 - TF (TransForm) Overview
- Intro
- Visualise a Robot TFs in RViz 2
- Relationship Between TFs, TF tree
- What problem are we trying to solve with TF?
UNIDAD 3 - Create a URDF for a Robot · 9 leccionesUNIDAD 3 - Create a URDF for a Robot
UNIDAD 3 - Create a URDF for a Robot
- Intro - What is URDF
- Your first URDF file: Create and Visualize a Link
- Material - Add Some Colors
- Combine 2 Links with a Joint
- Another example of the process to write the URDF right the first time
- Different Types of Joints in a URDF
- Add a Wheel to the Robot
- Activity 01 - Complete the URDF for the Robot
- Activity 01 - Solution
UNIDAD 4 - Broadcast TFs with the Robot State Publisher · 8 leccionesUNIDAD 4 - Broadcast TFs with the Robot State Publisher
UNIDAD 4 - Broadcast TFs with the Robot State Publisher
- Intro
- How the Robot State Publisher and URDF Work Together
- Run the Robot State Publisher with URDF in the Terminal (Command Line)
- Create a Robot Description Package to Install the URDF
- Write a Launch file to Start the Robot State Publisher with URDF (XML)
- Python Launch File
- Activity 02 - Add Rviz Config in the Launch File
- Activity 02 - Solution
UNIDAD 5 - Improve the URDF with Xacro · 9 leccionesUNIDAD 5 - Improve the URDF with Xacro
UNIDAD 5 - Improve the URDF with Xacro
- Intro
- Make the URDF Compatible with Xacro
- Create Variables with Xacro Properties
- Activity 03 - Xacro Properties
- Activity 03 - Solution
- Create Functions with Xacro Macros
- Include a Xacro File in Another Xacro File
- The Xacro Command to Generate the URDF
- Real Meshes - Quick Overview
UNIDAD 6 - Simulate Your Robot with Gazebo · 15 leccionesUNIDAD 6 - Simulate Your Robot with Gazebo
UNIDAD 6 - Simulate Your Robot with Gazebo
- Intro
- Run Gazebo
- How Gazebo Works with ROS
- Add Inertial Tags in the URDF
- Activity 04 - Inertia Macros
- Activity 04 - Solution
- Add Collision Tags in the URDF
- Spawn the Robot in Gazebo
- Activity 05 - Launch File to Start the Robot in Gazebo
- Activity 05 - Solution
- Add Gazebo Plugins to Control the Robot
- Set up the Gazebo Bridge
- Final result and Debugging
- Create a World in Gazebo
- Launch the Robot in the World
UNIDAD 7 - Add a Sensor in Gazebo · 4 leccionesUNIDAD 7 - Add a Sensor in Gazebo
UNIDAD 7 - Add a Sensor in Gazebo
- Intro
- Add a Camera to the URDF
- Add a Gazebo Plugin for the Camera
- Optional: Quick Fix for the Camera to Work with ROS
UNIDAD 8 - Final Project · 5 leccionesUNIDAD 8 - Final Project
UNIDAD 8 - Final Project
- Intro - Final Project Overview
- Step 1 - URDF Links and Joints
- Step 2 - Adapt the Robot for Gazebo
- Step 3 - Add Gazebo Plugins
- Step 4 - Combine the 2 Robots
UNIDAD 9 - OLD Gazebo (Classic) Content · 25 leccionesUNIDAD 9 - OLD Gazebo (Classic) Content
UNIDAD 9 - OLD Gazebo (Classic) Content
- PLEASE READ - Old Gazebo Content
- --- Simulate your Robot with Gazebo: Intro
- Run Gazebo
- How Gazebo Works with ROS
- Add Inertia Tags in the URDF
- Activity 04 - Inertia Macros
- Activity 04 - Solution
- Add Collision Tags in the URDF
- Spawn the Robot in Gazebo
- Activity 05 - Launch File to Start Robot in Gazebo
- Activity 05 - Solution
- Fixing the Inertia Values
- Fixing the Colors with Gazebo Material
- Add a Gazebo Plugin to Control the Robot
- Create a World in Gazebo
- Launch the Robot in the World
- --- Add a Sensor in Gazebo: Intro
- Add a Camera to the URDF
- Add a Gazebo Plugin for the Camera
- (Optional) Quick Fix For the Camera to Work with ROS
- --- Final Project: Intro and Project Overview
- Step 1 - URDF Links and Joints
- Step 2 - Adapt the Robot for Gazebo
- Step 3 - Add Gazebo Plugins
- Step 4 - Combine the 2 Robots
UNIDAD 10 - Conclusion · 3 leccionesUNIDAD 10 - Conclusion
UNIDAD 10 - Conclusion
- What you’ve learned - Recap
- What to do next
- Bonus Lecture
Tu certificado lo emite la SEP, no solo una plataforma
Al demostrar la competencia recibes un certificado emitido por la Secretaría de Educación Pública a través del Gobierno del Estado de México: un documento oficial que puedes presentar con confianza ante cualquier empleador o institución.
Tu certificado con INEC
- Lo emite la Secretaría de Educación Pública (SEP), a través del Gobierno del Estado de México
- Documento oficial con folio verificable en línea
- Lo otorga la Universidad Tecnológica Fidel Velázquez
Otras plataformas en línea
- Constancia privada emitida por la misma plataforma
- Solo acredita horas cursadas o asistencia
- Sin respaldo de una autoridad educativa
Tu itinerario, de la inscripción al certificado
- 1
Inscripción con pago único
Pagas $2,800 MXN una sola vez y entras de inmediato al curso.
- 2
Estudias a tu ritmo
10 unidades con videos, lecturas y actividades, disponibles 24/7 durante 12 meses.
- 3
Cuestionarios por unidad
Cuestionarios para comprobar lo aprendido.
- 4
Certificado
Emitido por la SEP a través del Gobierno del Estado de México, con folio verificable.
Un certificado oficial de la SEP
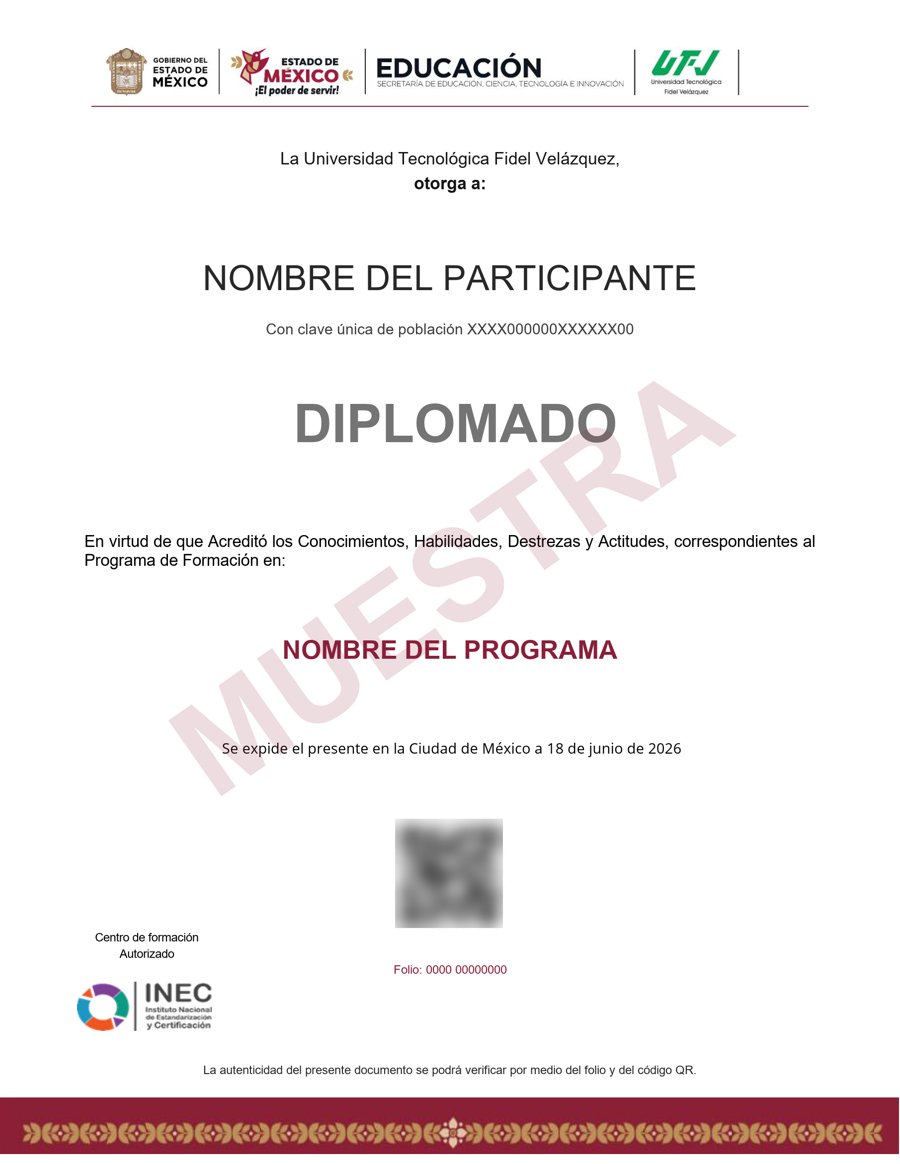
Muestra · verificable por folio y QR
- Emitido por la Secretaría de Educación Pública (SEP), a través del Gobierno del Estado de México. No es una constancia privada: es un documento oficial, y ese respaldo marca la diferencia frente a otras plataformas en línea.
- Contenido impartido por Edouard Renard.
- Folio y QR verificables para compartirlo con quien te contrate.
Empieza hoy, a tu ritmo
Un solo pago y acceso inmediato al curso completo durante 12 meses.
- 10 unidades · 88 lecciones · 50 h
- 12 meses de acceso
- Certificado emitido por la SEP (Gob. del Estado de México) con folio verificable
Sobre tu inscripción
¿Cómo es el pago?
Un solo pago de $2,800 MXN. No hay mensualidades ni cargos recurrentes.
¿Cuánto tiempo tengo acceso?
12 meses desde tu inscripción, 24/7, para avanzar a tu ritmo.
¿Quién imparte el contenido?
El curso es impartido por Edouard Renard; INEC gestiona tu inscripción, evaluación y certificado.
¿Qué pasa cuando vence mi acceso?
Puedes renovar tu cuenta tú mismo desde la plataforma, sin trámites ni esperas.

