
PL-400 prep: Microsoft Power Platform Developer
Extend the Power Platform using code. For people who have already studied for the PL-200 exam. For PL-400
Lo que serás capaz de hacer
This course is a follow-up course for you, if you have already studied for the PL-200 exams. This course covers the additional content required for the PL-400 certification exam, current as per the PL-400 exam update of 29 August 2025 and 19 March 2026. Please note: This course is not affiliated with, endorsed by, or sponsored by Microsoft. What do people like you say about this course? Assia says: Very interesting content ! and like always, the explanation way is amazing ! Elijah says: Matches the quality of all of Phillip Burton's other lessons. So far I have passed several exams using his courses in-tandem with MS learn modules. Ranjith says: Crystal clear explanation with standard english and quality practical, I wish I had this course earlier... Anuli says: Awesome course, the explanations were easy to understand, thank you. Consider updating some parts of the course. This course teaches the requirements for the Microsoft Certificate PL-400 " Power Platform Developer ", and focuses on programming in JavaScript/TypeScript and C# to expand the Power Platform. We'll start off by looking at extending the user experience . Using Visual Studio Code, we will create some JavaScript code that will run when our model-driven app is opened. We'll then create some command buttons, along code to run when the user clicks these. We will then concentrate on create code components, replacing existing parts of the model-driven app. We'll then look at creating a plug-in . The code that we'll write in Visual Studio will be attached to messages created by Power Platform, allowing our code to run when Dataverse rows are created, updated or deleted. We'll also look at creating our own custom messages as well. Next up is Custom Connectors . We will create an Azure Function, and find out when it can run. We will then integrate that Function into our Power Platform by creating a custom connector. We'll also register external endpoints, including in Azure, so that messages can be automatically sent to other apps, reducing the burden on the Power Platform. We'll finish off by looking at creating a technical design , and any other requirements not covered in previous exams, such as advanced Power Automate flows and implementing Application Lifecycle Management (ALM). No prior knowledge is required - we'll even see how to get a free Power Platform trial! There are regular quizzes to help you remember the information, so you can be sure that you are learning. Once you have completed this course, you will have a good knowledge of how to make extend Power Platform using JavaScript and C#. And with some practice, and knowledge gained when studying for the PL-200 exams, you could even go for the official Microsoft certification PL-400 - wouldn't that look good on your CV or resume? And if you are an American college student, you might even get college credit for passing that exam. So, without any further ado, let's have a look at how you can use Udemy interface, and then we'll have a look at the objectives for the exam and therefore the syllabus for this course.
- Extend the user experience, creating JavaScript code which runs when a model-driven app is opened, a button is clicked, and as part of a code component.
- Extend the platform, creating plug-ins, custom connectors and platform APIs
- Develop Integrations, publishing and consume Dataverse events, implementing data synchronization, and processing workloads
- Validate requirements and design technical architecture, implement Application Lifecycle Management, and implement error checking
- Download for free Visual Studio, Visual Studio Code, and more.
Temario
UNIDAD 1 - Introduction · 6 leccionesUNIDAD 1 - Introduction
UNIDAD 1 - Introduction
- Introduction
- Welcome to Udemy
- How to get the best out of your Udemy course
- Do you want auto-translated subtitles in more languages?
- Curriculum
- Resources
UNIDAD 2 - 9. Apply business logic using client scripting · 13 leccionesUNIDAD 2 - 9. Apply business logic using client scripting
UNIDAD 2 - 9. Apply business logic using client scripting
- Creating a Power Platform environment and a model-driven app
- Installing Visual Studio Code
- 44. What are the Event Handlers that I can use?
- 43. Writing our first JavaScript code, and registering an event handler
- 42. Setting and getting the value of fields
- 44. The executionContext.getFormContext() object
- 42. Adding Field Notifications
- 42. Debugging errors
- 42. Addressing a composite field
- Practice Activity Number 1
- Practice Activity Number 1 - The Solution
- JavaScript quiz
- Apply business logic using client scripting
UNIDAD 3 - Create a command button function · 9 leccionesUNIDAD 3 - Create a command button function
UNIDAD 3 - Create a command button function
- 31, 32. Create a command function - modern interface
- 32. Creating a JavaScript action for a command function
- 32. Expanding the Alert Dialog box
- 31. Creating a Power Fx Action for a command button
- 31. The Visible property, and the Patch and Confirm functions
- 31. Expanding the Confirm box, and other actions
- 31. The Classic Control interface - rules and actions
- 32. Managing dependencies between JavaScript libraries
- Create a command button function
UNIDAD 4 - 9. Create a Power Apps Component Framework (PCF) component · 17 leccionesUNIDAD 4 - 9. Create a Power Apps Component Framework (PCF) component
UNIDAD 4 - 9. Create a Power Apps Component Framework (PCF) component
- What is PCF, and installing PAC
- A problem with the latest version of PAC
- 48. Creating a PCF Project
- 49. Configuring a code component manifest
- 49. Configuring the Manifest Properties
- Got an error with Node.js with ESLint?
- 47, 50. Implementing a textbox interface, and the code component lifecycle
- 50. Expanding our textbox interface
- 50. Adding a label interface
- 50. Adding a button
- Downloading Visual Studio 2022
- 51. Packing and deploying the component
- 51. Importing Components into Canvas Power Apps
- 51. Consuming the component
- Updating our code
- Redeploying our component
- Create a Power Apps Component Framework (PCF) component
UNIDAD 5 - 45, 52. PCF samples, the Xrm method, and using XRM to navigate to custom pages · 8 leccionesUNIDAD 5 - 45, 52. PCF samples, the Xrm method, and using XRM to navigate to custom pages
UNIDAD 5 - 45, 52. PCF samples, the Xrm method, and using XRM to navigate to custom pages
- Additional sample resources
- 52. Using Device features
- 52. Using WebAPI features
- 52. Other Xrm features
- 46. Implement navigation to custom pages using the Client API
- 46. Passing a Record ID when navigating to the custom page
- 46. Using the Record ID in the custom page
- The Xrm method
UNIDAD 6 - 11. Creating our first plug-in · 9 leccionesUNIDAD 6 - 11. Creating our first plug-in
UNIDAD 6 - 11. Creating our first plug-in
- .NET 4.6.2
- 55. Creating the plug-in outline
- 55. Adding code to our plug-in
- 60, 86. Register custom assemblies by using the Plug-in Registration Tool
- 53. Describe the plug-in execution pipeline, and adding a step and testing
- 55. Adding tracing to our plug-in
- 55. Adding Profiling to our plug-in step
- 55. Adding additional error catching
- Creating our first plug-in
UNIDAD 7 - 11. Expanding our plug-in · 11 leccionesUNIDAD 7 - 11. Expanding our plug-in
UNIDAD 7 - 11. Expanding our plug-in
- 56. Implement business logic by using pre-images and post-images - Part 1
- 54, 56. Implement business logic by using pre-images and post-images - Part 2
- 57, 70. Introduction to the Organization service API, and creating a new table
- 57, 70. Using the Organization service API - Create
- 57, 70. Using the Organization service API - CreateRequest and CreateResponse
- 57, 70. Using the Organization service API - Update and Delete
- 57, 70, 91. Using the Organization service API - Retrieve, and alternative keys
- 57, 70, 91. More about alternative keys, and possible problems
- 57, 70. Using the Organization service API - RetrieveMultiple
- 92. Use the UpsertRequest message to synchronize data
- Expanding our plug-in
UNIDAD 8 - 11. Optimizing plug-in performance, and implement data synchronization · 8 leccionesUNIDAD 8 - 11. Optimizing plug-in performance, and implement data synchronization
UNIDAD 8 - 11. Optimizing plug-in performance, and implement data synchronization
- 58, 71. Optimize plug-in performance by configuring concurrency
- 58, 71. Optimize plug-in performance by configuring transactions
- 71. Optimize plug-in performance by configuring batching
- 89. Table Change Tracking
- 59. Configure a Dataverse custom API message
- 61. Develop a plug-in that targets a custom action message
- 61a. Writing code to trigger (using a Dataverse business event) a custom message
- Optimizing plug-in performance, and implement data synchronization
UNIDAD 9 - Process workloads · 8 leccionesUNIDAD 9 - Process workloads
UNIDAD 9 - Process workloads
- 11, 67, 75. Creating an Azure Function App in Microsoft Azure
- 11, 67, 75. Creating an event-driven Function
- 75. Configure other triggers, including scheduled triggers, in Azure Functions
- 75. Create an event-driven function in Visual Studio
- 74. How you can process long-running operations using Azure Durable Functions
- Version of npm for Durable Functions
- 74. Creating an Azure Duration function
- Process workloads
UNIDAD 10 - Create custom connectors and authentication · 8 leccionesUNIDAD 10 - Create custom connectors and authentication
UNIDAD 10 - Create custom connectors and authentication
- 10, 62. Create a definition for the API
- 65, 66, 67. Expand the custom connector for an Azure service
- 68a. Develop code for a custom connector to transform data
- 68. Extend an Open API definition for a custom connector
- 64. Use policy templates to modify connector behavior at runtime
- 65. Import definitions from existing APIs including Open API, Azure and GitHub
- 63, 73. Perform authentication by using OAuth and configure API security
- Create custom connectors and authentication
UNIDAD 11 - Use platform APIs and consume Dataverse events · 9 leccionesUNIDAD 11 - Use platform APIs and consume Dataverse events
UNIDAD 11 - Use platform APIs and consume Dataverse events
- What is Graph API?
- 70. Implement API limit retry policies
- 13, 87, 88. Register Azure Service Bus endpoint
- 85. Publish a Dataverse event by using the IServiceEndpointNotificationService
- 13, 87, 88. Register webhook service endpoint
- 13, 87, 88. Register Azure Event Hub endpoint
- 13, 88. Implement a Dataverse listener for an Azure solution
- 13, 78. Implement an Azure listener in Power Automate
- Use platform APIs and consume Dataverse events
UNIDAD 12 - Create a technical design · 8 leccionesUNIDAD 12 - Create a technical design
UNIDAD 12 - Create a technical design
- 1. Design and validate the technical architecture for a solution
- 2. Design authentication and authorization strategy
- 3. Determine whether you can meet requirements with out-of-the-box functionality
- 4. Determine when to use Logic Apps versus Power Automate cloud flows
- 6. Determine when to build standard tables, virtual tables, or use connectors
- 6a. Determine when to use elastic tables
- 11. Describe Dataverse custom APIs and their uses
- Create a technical design
UNIDAD 13 - Configure Microsoft Dataverse · 4 leccionesUNIDAD 13 - Configure Microsoft Dataverse
UNIDAD 13 - Configure Microsoft Dataverse
- 15. Troubleshoot operational security issues found in testing
- -. Implement source control for projects including solutions and code assets
- 17. Describe application lifecycle management concepts
- Configure Microsoft Dataverse
UNIDAD 14 - Manage and troubleshoot apps · 5 leccionesUNIDAD 14 - Manage and troubleshoot apps
UNIDAD 14 - Manage and troubleshoot apps
- 40. Optimize app performance
- 41. Optimize model-driven app performance including forms and views
- 39. Identify and resolve connector and API issues
- 38. Troubleshoot app issues by using Monitor and other browser-based debug tools
- Manage and troubleshoot apps
UNIDAD 15 - Configure Power Automate flows · 9 leccionesUNIDAD 15 - Configure Power Automate flows
UNIDAD 15 - Configure Power Automate flows
- 82, 84. Power Automate - Implement error handling and retry policies
- 82. Error status codes
- 84. Configure trigger filters
- 84. Configure trigger filter operators and functions
- 84a. Develop reuseable logic by using child flows
- 80, 81. Implement Azure Key Vault, and manage sensitive input/output parameters
- 81, 83. Utilize Azure Key Vault using Microsoft Entra ID service principals
- 83. Other ways to implement Microsoft Entra ID service principals
- Configure Power Automate flows
UNIDAD 16 - Implement Application Lifecycle Management (ALM) · 6 leccionesUNIDAD 16 - Implement Application Lifecycle Management (ALM)
UNIDAD 16 - Implement Application Lifecycle Management (ALM)
- 27. Manage solution layers
- 22. Implementing Platform host pipelines
- 22. Creating Custom pipelines
- 22. Running a Custom pipeline, exploring Deployment Pipeline Configuration app
- 23. Creating an Azure DevOps organization to use Power Platform Build Tools
- 23. Exploring Power Platform tasks to add to a CI/CD pipeline
UNIDAD 17 - Congratulations · 4 leccionesUNIDAD 17 - Congratulations
UNIDAD 17 - Congratulations
- What's next?
- Practice Test 1
- Practice Test 2
- Congratulations for completing the course
UNIDAD 18 - Additional videos - Videos no longer needed for the PL-400 exam · 10 leccionesUNIDAD 18 - Additional videos - Videos no longer needed for the PL-400 exam
UNIDAD 18 - Additional videos - Videos no longer needed for the PL-400 exam
- No longer needed for PL-400 exam
- Describe how to use Package Deployer and associated tools creating a package
- Deploying a Package Deployer
- Create, manage, and interact with business process flows by using code
- Events and methods which can be used with Business Process Flows
- Determine when to use serverless computing, plug-ins, or Power Automate
- Server-side/client-side Code vs Power Automate
- Creating a test in Test Studio
- Running and updating a test in Test Studio
- Additional videos
UNIDAD 19 - Bonus section · 1 leccionesUNIDAD 19 - Bonus section
UNIDAD 19 - Bonus section
- Bonus Lecture - PL-400
Tu certificado lo emite la SEP, no solo una plataforma
Al demostrar la competencia recibes un certificado emitido por la Secretaría de Educación Pública a través del Gobierno del Estado de México: un documento oficial que puedes presentar con confianza ante cualquier empleador o institución.
Tu certificado con INEC
- Lo emite la Secretaría de Educación Pública (SEP), a través del Gobierno del Estado de México
- Documento oficial con folio verificable en línea
- Lo otorga la Universidad Tecnológica Fidel Velázquez
Otras plataformas en línea
- Constancia privada emitida por la misma plataforma
- Solo acredita horas cursadas o asistencia
- Sin respaldo de una autoridad educativa
Tu itinerario, de la inscripción al certificado
- 1
Inscripción con pago único
Pagas $2,800 MXN una sola vez y entras de inmediato al curso.
- 2
Estudias a tu ritmo
19 unidades con videos, lecturas y actividades, disponibles 24/7 durante 12 meses.
- 3
Cuestionarios por unidad
18 cuestionarios para comprobar lo aprendido.
- 4
Certificado
Emitido por la SEP a través del Gobierno del Estado de México, con folio verificable.
Un certificado oficial de la SEP
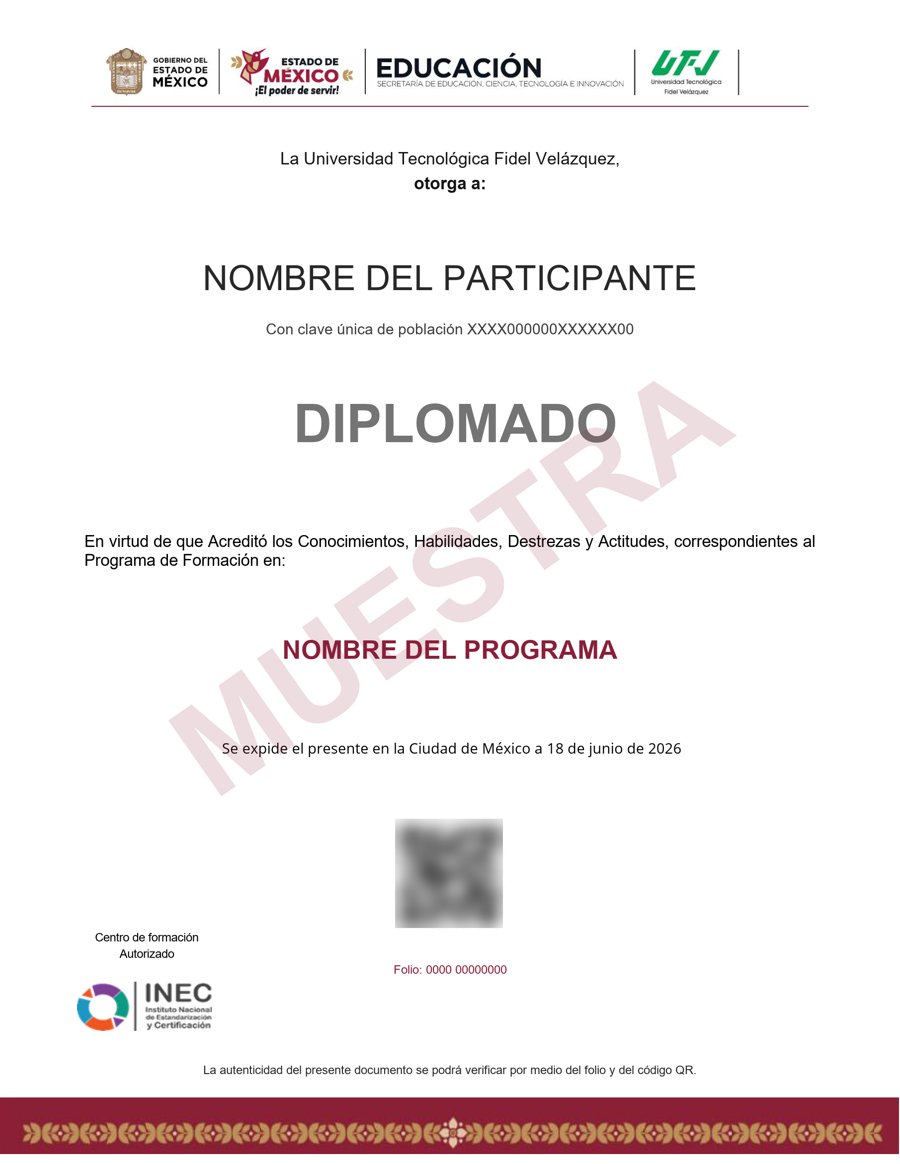
Muestra · verificable por folio y QR
- Emitido por la Secretaría de Educación Pública (SEP), a través del Gobierno del Estado de México. No es una constancia privada: es un documento oficial, y ese respaldo marca la diferencia frente a otras plataformas en línea.
- Contenido impartido por Phillip Burton • over one million students so far.
- Folio y QR verificables para compartirlo con quien te contrate.
Empieza hoy, a tu ritmo
Un solo pago y acceso inmediato al curso completo durante 12 meses.
- 19 unidades · 153 lecciones · 60 h
- 12 meses de acceso
- 18 cuestionarios de evaluación
- Certificado emitido por la SEP (Gob. del Estado de México) con folio verificable
Sobre tu inscripción
¿Cómo es el pago?
Un solo pago de $2,800 MXN. No hay mensualidades ni cargos recurrentes.
¿Cuánto tiempo tengo acceso?
12 meses desde tu inscripción, 24/7, para avanzar a tu ritmo.
¿Quién imparte el contenido?
El curso es impartido por Phillip Burton • over one million students so far; INEC gestiona tu inscripción, evaluación y certificado.
¿Qué pasa cuando vence mi acceso?
Puedes renovar tu cuenta tú mismo desde la plataforma, sin trámites ni esperas.

