
Mastering Microcontroller: STM32-LTDC, LCD-TFT, LVGL (MCU3)
Step by step guide to microcontroller based embedded graphics system , Interfacing, and building graphical UI using LVGL
Lo que serás capaz de hacer
In this course, you learn the embedded graphics systems and programming part of it along with using LVGL for creating UI applications. In the first part of the course, you will learn, 1. Basics of embedded graphics systems 2. how to interface an LCD-TFT display to the microcontroller board. 3. How to use the LTDC peripheral of the STM32 microcontroller, 4. How to communicate between the microcontroller and the TFT display using MIPI DPI and MIPI DBI 5. Bare metal programming In this part you are going to write all the code, completely from scratch, that is using register-level programming. In the second part, you will learn, 1. Introduction to LVGL ( an open-source graphics library for microcontrollers) 2. Using LVGL in STM32 projects 3. LVGL widgets and their usage, APIs 4. Create UI application using LVGL 5. Testing LVGL application on PC simulator and different STM32 development boards 6. Student project In this course I will show you how you can create an embedded graphics application for 3 different boards simultaneously you can either use the STM32F429 Discovery board or STM32F74x Discovery board or you can use any STM32 board with external TFT LCD interfaced via the SPI interface. Please read the course description carefully and you may also watch free preview videos before enrolling in this course. Hardware requirements: If you want to test the code developed for target hardware, you would need any one of the below-mentioned board For more information please watch the preview videos above. 1. 32F429IDISCOVERY Discovery kit with STM32F429ZI MCU (Explained in the course) or 2. 32F746GDISCOVERY Discovery kit (STM32F746NG MCU) (Explained in the course) or 3. STM32F7508-DK Discovery kit with STM32F750N8 MCU or 4. STM32F4DISCOVERY Discovery kit with STM32F407VG MCU + External ILI9341 TFT-LCD interfaced via SPI (Explained in the course) or 5. Any stm32 board + External ILI9341 TFT-LCD interfaced via SPI 6. USB logic analyzer (Optional ) 7. Jumper wires if you are using hardware option 4 or 5 Note: LVGL applications can be tested on a PC simulator without the need for any target hardware. Software requirements: STM32CUBEIDE Learning order of FastBit Embedded Brain Academy Courses, If you are a beginner in the field of embedded systems, then you can take our courses in the below-mentioned order. This is just a recommendation from the instructor for beginners. 1) Microcontroller Embedded C Programming: absolute beginners(Embedded C) 2) Embedded Systems Programming on ARM Cortex-M3/M4 Processor(ARM Cortex M4 Processor specific) 3) Mastering Microcontroller with Embedded Driver Development(MCU1) 4) Mastering Microcontroller: TIMERS, PWM, CAN, RTC,LOW POWER(MCU2) 5) Mastering Microcontroller: STM32-LTDC, LCD-TFT, LVGL(MCU3) 6) Embedded System Design using UML State Machines(State machine) 7) Mastering RTOS: Hands-on FreeRTOS and STM32Fx with Debugging(RTOS) 8) ARM Cortex M Microcontroller DMA Programming Demystified(DMA) 9) STM32Fx Microcontroller Custom Bootloader Development(Bootloader) 10) Embedded Linux Step by Step using Beaglebone Black(Linux) 11) Linux device driver programming using Beaglebone Black(LDD1) Other programming courses 1) Master The Rust Programming Language : Beginner To Advanced
- Embedded graphics systems
- Interfacing RGB TFT LCD using MIPI DPI and MIPI DBI
- Interfacing SPI based TFT-LCD display and programming
- STM32 LTDC configuration and programming
- STM32 LTDC Layers programming
- Running LVGL on simulator and on STM32 microcontroller
Temario
UNIDAD 1 - Embedded graphics systems · 10 leccionesUNIDAD 1 - Embedded graphics systems
UNIDAD 1 - Embedded graphics systems
- About the instructor
- Important Note
- Course repository
- Introduction to embedded graphics system
- Hardware to use with this course
- IDE Installation
- Roaring tiger demo on STM32F429DISC board
- Roaring tiger demo on STM32F746-DISC board
- Roaring tiger demo on STM32F407-DISC board with external LCD
- LCD module interfacing explanation on various boards
UNIDAD 2 - Important terminologies in graphic systems · 4 leccionesUNIDAD 2 - Important terminologies in graphic systems
UNIDAD 2 - Important terminologies in graphic systems
- RGB display and pixel
- Important pixel formats
- Pixel density and resolution
- Converting bmp images to 'C' byte array
UNIDAD 3 - LCD-TFT Display Controller · 4 leccionesUNIDAD 3 - LCD-TFT Display Controller
UNIDAD 3 - LCD-TFT Display Controller
- About LTDC peripheral of STM32 MCU
- Display interface types
- Significance of RGB interface signals
- Analyzing RGB interface signals
UNIDAD 4 - LCD interfacing and register level programming · 8 leccionesUNIDAD 4 - LCD interfacing and register level programming
UNIDAD 4 - LCD interfacing and register level programming
- Exercise-001 : Displaying VIGBYOR bars on the display
- Setting up main system clock of the MCU
- Setting up main system clock code implementation part-1
- Setting up main system clock code implementation part-2
- Setting up main system clock code implementation part-3
- Setting up main system clock code implementation part-4
- Setting up main system clock code implementation part-5
- Setting up main system clock code implementation part-6
UNIDAD 5 - TFT-LCD Interfacing and programming · 26 leccionesUNIDAD 5 - TFT-LCD Interfacing and programming
UNIDAD 5 - TFT-LCD Interfacing and programming
- ILI9341 LCD programming and data interface
- LCD SPI initialization coding part-1
- LCD SPI initialization coding part-2
- LCD SPI initialization coding part-3
- Configuring GPIO pins for SPI functionality
- SPI peripheral configuration coding
- LCD SPI initialization for STM32F407x+External LCD
- ILI9341 TFT-LCD Initialization commands
- Testing TFT-LCD command sending
- LTDC configuration
- LTDC pin initialization
- LTDC peripheral configuration part-1
- LTDC peripheral configuration part-2
- LTDC background testing
- LTDC signals trace analysis
- LTDC layers initialization
- LTDC Layers initialization coding and windowing explanation
- LTDC Layers initialization coding contd
- LTDC layer testing on hardware
- Testing exercise 001 in landscape mode
- About portrait orientation
- Testing exercise 001 in portrait mode
- Pixel writing in the case of STM32F407x+ External LCD
- Testing background color STM32F407X+external LCD
- Windowing in the case of STM32F407X+external LCD
- Testing exercise 001 : STM32F407x + External LCD
UNIDAD 6 - LVGL · 2 leccionesUNIDAD 6 - LVGL
UNIDAD 6 - LVGL
- LVGL and simulator download
- LVGL simulator sample applications
UNIDAD 7 - Running LVGL on STM32 microcontroller · 4 leccionesUNIDAD 7 - Running LVGL on STM32 microcontroller
UNIDAD 7 - Running LVGL on STM32 microcontroller
- Exercise 002 : project creation
- Adding LVGL source to the project
- Analyzing memory consumption and testing LVGL on STM32F429 board
- LVGL project for STM32F746x and STM32F407 disc board
UNIDAD 8 - Creating LVGL GUI · 12 leccionesUNIDAD 8 - Creating LVGL GUI
UNIDAD 8 - Creating LVGL GUI
- Exercise 003: RGB mixer demo
- LVGL object
- Exercise implementation on simulator part-1
- Exercise implementation on simulator part-2
- Exercise implementation on simulator part-3
- Exercise implementation on simulator part-4
- Exercise implementation on simulator part-5
- Exercise implementation on simulator part-6
- Exercise implementation on simulator part-7
- Exercise implementation on simulator part-8
- Testing RGB mixer application on STM32F429 DISC board
- Testing RGB mixer application on STM32F746 and STM32F407 DISC board
UNIDAD 9 - LVGL Project · 6 leccionesUNIDAD 9 - LVGL Project
UNIDAD 9 - LVGL Project
- Project explanation
- Project demo on simulator
- About touch screen controller
- Project demo on stm32 boards
- lvgl_menu example
- BONUS LECTURE
Tu certificado lo emite la SEP, no solo una plataforma
Al demostrar la competencia recibes un certificado emitido por la Secretaría de Educación Pública a través del Gobierno del Estado de México: un documento oficial que puedes presentar con confianza ante cualquier empleador o institución.
Tu certificado con INEC
- Lo emite la Secretaría de Educación Pública (SEP), a través del Gobierno del Estado de México
- Documento oficial con folio verificable en línea
- Lo otorga la Universidad Tecnológica Fidel Velázquez
Otras plataformas en línea
- Constancia privada emitida por la misma plataforma
- Solo acredita horas cursadas o asistencia
- Sin respaldo de una autoridad educativa
Tu itinerario, de la inscripción al certificado
- 1
Inscripción con pago único
Pagas $2,800 MXN una sola vez y entras de inmediato al curso.
- 2
Estudias a tu ritmo
9 unidades con videos, lecturas y actividades, disponibles 24/7 durante 12 meses.
- 3
Cuestionarios por unidad
Cuestionarios para comprobar lo aprendido.
- 4
Certificado
Emitido por la SEP a través del Gobierno del Estado de México, con folio verificable.
Un certificado oficial de la SEP
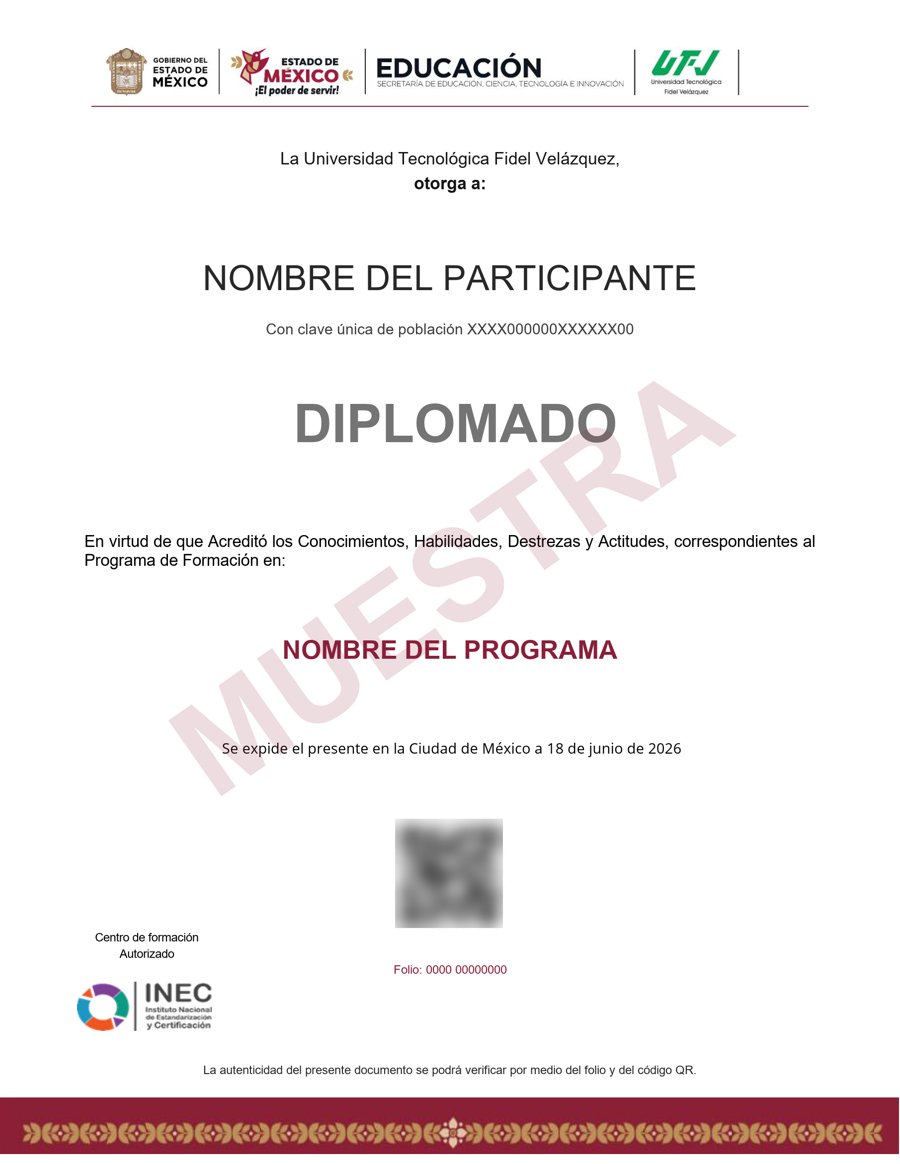
Muestra · verificable por folio y QR
- Emitido por la Secretaría de Educación Pública (SEP), a través del Gobierno del Estado de México. No es una constancia privada: es un documento oficial, y ese respaldo marca la diferencia frente a otras plataformas en línea.
- Contenido impartido por FastBit Embedded Brain Academy.
- Folio y QR verificables para compartirlo con quien te contrate.
Empieza hoy, a tu ritmo
Un solo pago y acceso inmediato al curso completo durante 12 meses.
- 9 unidades · 76 lecciones · 45 h
- 12 meses de acceso
- Certificado emitido por la SEP (Gob. del Estado de México) con folio verificable
Sobre tu inscripción
¿Cómo es el pago?
Un solo pago de $2,800 MXN. No hay mensualidades ni cargos recurrentes.
¿Cuánto tiempo tengo acceso?
12 meses desde tu inscripción, 24/7, para avanzar a tu ritmo.
¿Quién imparte el contenido?
El curso es impartido por FastBit Embedded Brain Academy; INEC gestiona tu inscripción, evaluación y certificado.
¿Qué pasa cuando vence mi acceso?
Puedes renovar tu cuenta tú mismo desde la plataforma, sin trámites ni esperas.

