
Mastering Embedded Rust: Bare Metal, FFI, Crates, Projects
Master safe, modern embedded systems in Rust with bare-metal, FFI, drivers, crates & projects on STM32 microcontrollers
Lo que serás capaz de hacer
==> Looking to add another embedded programming language to your arsenal? Give Rust a shot — you won’t be disappointed!! <== This course is your starting point for using Rust on ARM Cortex Mx based microcontrollers such as STM32, even if you are new to embedded systems. This is a fully hands on course that takes you from scratch into real world embedded Rust development on STM32. Each video builds on the previous, helping you progress step-by-step, from writing bare metal code to advanced topics like FFI, crates, driver development, and traits. Ideal for those new to Rust and embedded systems. Why Rust for embedded? Rust prevents many common memory issues (like null pointer dereferencing, buffer overflows, and use-after-free errors) through: Ownership model : Rust’s strict rules around ownership, borrowing, and lifetimes prevent most accidental memory misuse. Type safety : Rust’s type system ensures that you access data correctly and helps prevent certain types of invalid memory access by enforcing strict variable usage patterns. Thanks to Cargo, Rust’s official package manager, you can easily add features by simply including external libraries, or "crates," which are like plug-and-play components. What will you learn? Here’s what you will master in this course: A beginner-friendly introduction to Rust, tailored for embedded systems Complete toolchain setup for cross-compiling, flashing, and debugging Debugging and logging with defmt and probe-rs for real-time tracing High-level peripheral programming with STM32 HAL crate Step-by-step, build a real-world Flappy Bird game application using Rust Interface with real sensors (MPU6050) to control game mechanics Clean, modular coding practices and hardware abstraction Build hardware-agnostic drivers using the embedded-hal traits Writing and understanding your own linker scripts and startup code Building generic embedded code using Rust generics and traits Safe and seamless Rust + C integration through FFI Confidence to write robust, reusable, and production-grade embedded firmware in Rust Hardware Requirements Note: If you already have a microcontroller development board, we recommend continuing with it. This course is designed with such thoroughness that the concepts and steps can be applied to most development boards though some minor adjustments may be needed. But, if you prefer to use the exact same board as the instructor for a smoother experience, you can check out the recommended hardware 1) Microcontroller development board Option-1. STM32F303-Based Board The course primarily utilizes Fastbit STM32 Nano board which is based on the STM32F303 microcontroller and onboard MPU6050 sensor. Option 2. Any STM32 Microcontroller Board You can use any development board featuring an STM32 microcontroller. The course content is designed to be adaptable, allowing you to follow along with the specific STM32 board you have available. 2) SWD-Based Debugger An SWD (Serial Wire Debug) based debugger is required for programming and debugging your STM32 microcontroller. This tool is essential for loading your programs onto the microcontroller and for debugging your projects in real-time. 3) LCD shield In one of the projects, you will need a TFT LCD module for experimentation. This course uses the Fastbit 1.28" TFT LCD with an 8-bit parallel interface, based on the GC9A01 LCD driver. However, you are free to use the same or a similar compatible module 4) MPU6050 sensor Software requirements VS Code STM32CubeIDE
- Rust programming language from scratch
- Build your first bare-metal Rust application from scratch
- Learn how to set up the Rust toolchain for building firmware that runs on ARM Cortex-M microcontrollers
- Write your own linker script and startup file, and understand how memory layout and bootstrapping work in embedded Rust
- Use cargo-binutils to inspect and analyze ELF files
- Set up a modern and efficient workflow using VS Code to build, flash, and debug your Rust code with embedded targets
Temario
UNIDAD 1 - Introduction · 2 leccionesUNIDAD 1 - Introduction
UNIDAD 1 - Introduction
- Welcome
- Course repository
UNIDAD 2 - Rust Toolchain Installation · 5 leccionesUNIDAD 2 - Rust Toolchain Installation
UNIDAD 2 - Rust Toolchain Installation
- Toolchain installation for Host
- Toolchain components and target triple of Tier 1 targets
- Install VS Code IDE
- Creating a Rust project using Cargo and Important VS code extensions
- Important tools: rustfmt, cargo fix , Clippy
UNIDAD 3 - Rust Fundamentals: Quick intro to core concepts · 35 leccionesUNIDAD 3 - Rust Fundamentals: Quick intro to core concepts
UNIDAD 3 - Rust Fundamentals: Quick intro to core concepts
- How Rust ensures memory safety compared to C/C++ part 1
- Variables and numerical data types
- Byte literal
- Char and unicode representation
- Statics
- Constants
- How Rust ensures memory safety compared to C/C++ part 2
- Arrays
- References
- Borrow(&T and &mut T)
- Can you help us?
- slice data type
- if..else as a statement and expression
- match statement
- if..let statement
- How Rust ensures memory safety compared to C/C++ part 3
- Comparison and logical operators
- Bitwise operators
- Strings
- UTF8 encoded string
- String literal type(&str)
- Function declaration and parameters
- Structures
- Printing the structure
- Initializing struct with defaults
- Passing struct variables to functions
- Creating methods for a struct
- Associated functions(Constructor) of struct
- Enums
- Methods and associated functions of an enum type
- Option<T>
- Result<T, E>.
- Error handling using Result type
- Error propagation using ?
- Generics.
UNIDAD 4 - Cross compilation · 6 leccionesUNIDAD 4 - Cross compilation
UNIDAD 4 - Cross compilation
- About the hardware
- Intro to cross compilation for target architecture
- Exercise 001: Generating ELF file for the very basic rust program part 1
- Generating ELF file for the very basic rust program part 2
- About Type 'never'(!)
- Inspecting ELF file using cargo-binutils
UNIDAD 5 - Writing start-up code and linker script for bare metal Rust program · 13 leccionesUNIDAD 5 - Writing start-up code and linker script for bare metal Rust program
UNIDAD 5 - Writing start-up code and linker script for bare metal Rust program
- Writing start-up code part-1
- About Linker, Linker flags and Linker script
- Writing linker script from scratch part 1 [MEMORY]
- Different types of data in a program
- Writing linker script from scratch part 2 [SECTIONS]
- Writing linker script from scratch part 3
- Writing start-up code part-2 [Vector table]
- Writing start-up code part-3 [extern "C"]
- Writing start-up code part-4 [Default_Handlers]
- Writing start-up code part-5 [Reset_Handler]
- Raw pointers in Rust
- Writing start-up code part-6 [Reset_Handler]
- Can you help us?
UNIDAD 6 - Flash and Debug · 3 leccionesUNIDAD 6 - Flash and Debug
UNIDAD 6 - Flash and Debug
- Flashing code to target hardware-1 [Install STM32CubeCLT]
- Flashing code to target hardware-2 [VsCode and cortex-debug setup]
- Flashing code using probe.rs tools
UNIDAD 7 - Exercise 002: Bare metal Rust application to handle LEDs using Interrupts · 18 leccionesUNIDAD 7 - Exercise 002: Bare metal Rust application to handle LEDs using Interrupts
UNIDAD 7 - Exercise 002: Bare metal Rust application to handle LEDs using Interrupts
- Introduction
- Exercise Implementation Part 1
- Exercise Implementation Part 2
- Exercise Implementation Part 3
- Exercise Implementation Part 4
- Exercise Implementation Part 5
- Exercise Implementation Part 6
- Exercise Implementation Part 7 and Testing LED module
- Unsafe block vs Unsafe fn
- Commenting and generating documentation part 1 [/// Outer documentation]
- Commenting and generating documentation part 2 [//! Inner documentation]
- Exercise Implementation Part 8; Writing button module
- Exercise Implementation Part 9; Coding for button interrupt
- Exercise Implementation Part 10
- Exercise Implementation Part 11
- Exercise Implementation Part 12
- Exercise Implementation Part 13
- Exercise Implementation Part 14: Testing button interrupt
UNIDAD 8 - Exercise 003: Using external crate cortex-m-rt and cortex-m · 9 leccionesUNIDAD 8 - Exercise 003: Using external crate cortex-m-rt and cortex-m
UNIDAD 8 - Exercise 003: Using external crate cortex-m-rt and cortex-m
- What is a crate?
- Important crates for embedded systems
- Exercise introduction
- Cortex-m-rt crate explanation
- Crate version number syntax
- Panic handling crates
- Systick time base generation using cortex-m crate
- Testing Systick time base generation
- Can you help us?
UNIDAD 9 - Exercise 004: ITM prints · 6 leccionesUNIDAD 9 - Exercise 004: ITM prints
UNIDAD 9 - Exercise 004: ITM prints
- Exercise 004 introduction
- Instrumentation Trace Macrocell(ITM)
- Exercise implementation
- Refactoring and Testing
- Critical section
- Mutex and Refcell
UNIDAD 10 - Rust Foreign Function Interface(FFI) · 9 leccionesUNIDAD 10 - Rust Foreign Function Interface(FFI)
UNIDAD 10 - Rust Foreign Function Interface(FFI)
- Steps involved in dealing with Rust and Foreign language code
- Types mapping between Rust and C
- Rust equivalent of C's void and void pointer
- Rust equivalent of C's void and void pointer contd.
- Rust representation of C's String
- Rust accepting and processing Strings from 'C' (core::ffi::Cstr)
- Rust sending Strings to 'C' (std::ffi::CString)
- Struct memory layout: Rust Vs C
- Passing struct from Rust to C
UNIDAD 11 - Exercise 005: Flappy Bird game implementation(Rust + C) · 37 leccionesUNIDAD 11 - Exercise 005: Flappy Bird game implementation(Rust + C)
UNIDAD 11 - Exercise 005: Flappy Bird game implementation(Rust + C)
- Introduction to Flappy bird application
- Implementation : Peripheral config and code generation(8 bit parallel LCD)
- Implementation: Peripheral config and code generation(SPI based LCD)
- Copy driver files into the project
- Compiling 'C' source files from Rust project: How it works?
- Writing build.rs part 1
- Writing build.rs part 2
- Writing build.rs part 3
- Writing build.rs part 4
- Writing build.rs part 5
- Testing project for systick interrupt generation
- Analysing the issue related to weak symbol linkage
- Fixing issue related to weak symbol linkage and testing project
- Game feature : Start screen implementation part-1
- Game feature : Start screen implementation part-2
- Game feature : Start screen implementation part-3
- Game feature : Start screen implementation part-4
- Game feature : Start screen implementation part-5
- Game feature : Start screen implementation part-6
- Game feature : Start screen implementation part-7
- Game feature : Start screen implementation part-8
- Game feature : Start screen implementation part-9
- Game feature : Start screen implementation part-10
- Game feature : Start screen implementation part-11
- Game feature : Start screen implementation part-12
- Game feature : Start screen implementation part-13
- Game feature: Obstacle movement implementation part-1
- Game feature: Obstacle movement implementation part-2
- Game feature: Obstacle movement implementation part-3
- Game feature: Obstacle movement implementation part-4
- Game feature: Obstacle movement implementation part-5
- Game feature: Obstacle movement implementation part-6
- Game feature: Player movement implementation part-1
- Game feature: Player movement implementation part-2
- Game feature: Collision detection implementation part-1
- Game feature: Collision detection implementation part-2
- Game feature: Collision detection implementation part-3
UNIDAD 12 - Creating hardware agnostic device driver using embedded-hal · 11 leccionesUNIDAD 12 - Creating hardware agnostic device driver using embedded-hal
UNIDAD 12 - Creating hardware agnostic device driver using embedded-hal
- About hardware agnostic driver development
- MPU6050 driver crate implementation part-1
- MPU6050 driver crate implementation part-2
- MPU6050 driver crate implementation part-3
- MPU6050 driver crate implementation part-4
- MPU6050 driver crate implementation part-5
- MPU6050 driver crate implementation part-6
- MPU6050 driver crate implementation part-7
- MPU6050 driver crate implementation part-8
- MPU6050 driver crate implementation part-9
- Adding [features] to driver crate
UNIDAD 13 - Working with Hal crate and PAC · 5 leccionesUNIDAD 13 - Working with Hal crate and PAC
UNIDAD 13 - Working with Hal crate and PAC
- Exercise 005: Reading from sensor part 1
- PAC and HAL
- I2C initialization coding part 1
- I2C initialization coding part 2
- I2C initialization coding part 3
UNIDAD 14 - Using Traits · 3 leccionesUNIDAD 14 - Using Traits
UNIDAD 14 - Using Traits
- Handling input device via Trait implementation part 1
- Handling input device via Trait implementation part 2
- Handling input device via Trait implementation part 3
UNIDAD 15 - Logging · 2 leccionesUNIDAD 15 - Logging
UNIDAD 15 - Logging
- Logging data using RTT and probe.rs
- Logging data using RTT testing
UNIDAD 16 - Exercise 005: Flappy Bird game implementation(Rust + C) contd. · 8 leccionesUNIDAD 16 - Exercise 005: Flappy Bird game implementation(Rust + C) contd.
UNIDAD 16 - Exercise 005: Flappy Bird game implementation(Rust + C) contd.
- Game feature : Calculating roll angle
- Game feature : Map roll angle to bird position
- Updating bird Y position
- Note about sensor noise
- Testing final application
- TODOs for the students
- Next videos coming soon
- BONUS LECTURE
Tu certificado lo emite la SEP, no solo una plataforma
Al demostrar la competencia recibes un certificado emitido por la Secretaría de Educación Pública a través del Gobierno del Estado de México: un documento oficial que puedes presentar con confianza ante cualquier empleador o institución.
Tu certificado con INEC
- Lo emite la Secretaría de Educación Pública (SEP), a través del Gobierno del Estado de México
- Documento oficial con folio verificable en línea
- Lo otorga la Universidad Tecnológica Fidel Velázquez
Otras plataformas en línea
- Constancia privada emitida por la misma plataforma
- Solo acredita horas cursadas o asistencia
- Sin respaldo de una autoridad educativa
Tu itinerario, de la inscripción al certificado
- 1
Inscripción con pago único
Pagas $2,800 MXN una sola vez y entras de inmediato al curso.
- 2
Estudias a tu ritmo
16 unidades con videos, lecturas y actividades, disponibles 24/7 durante 12 meses.
- 3
Cuestionarios por unidad
Cuestionarios para comprobar lo aprendido.
- 4
Certificado
Emitido por la SEP a través del Gobierno del Estado de México, con folio verificable.
Un certificado oficial de la SEP
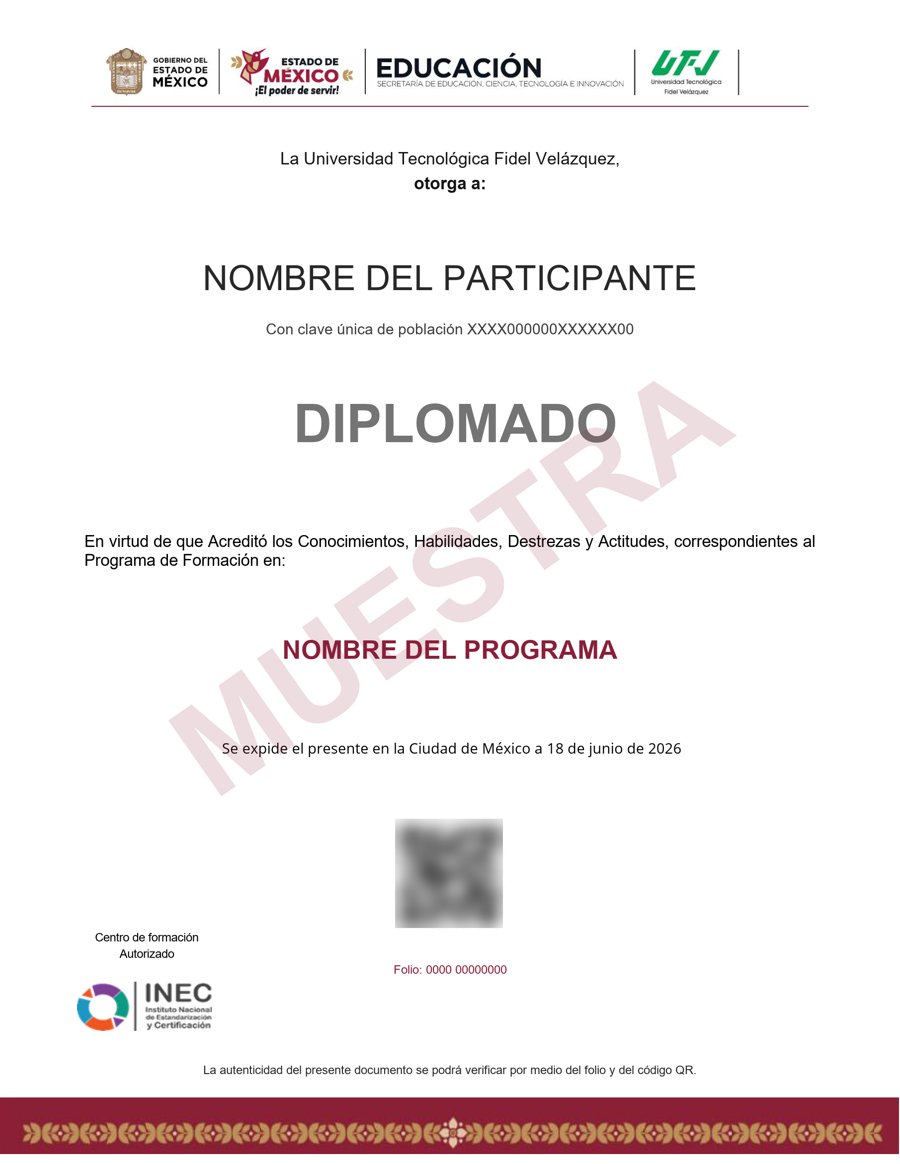
Muestra · verificable por folio y QR
- Emitido por la Secretaría de Educación Pública (SEP), a través del Gobierno del Estado de México. No es una constancia privada: es un documento oficial, y ese respaldo marca la diferencia frente a otras plataformas en línea.
- Contenido impartido por FastBit Embedded Brain Academy.
- Folio y QR verificables para compartirlo con quien te contrate.
Empieza hoy, a tu ritmo
Un solo pago y acceso inmediato al curso completo durante 12 meses.
- 16 unidades · 172 lecciones · 60 h
- 12 meses de acceso
- Certificado emitido por la SEP (Gob. del Estado de México) con folio verificable
Sobre tu inscripción
¿Cómo es el pago?
Un solo pago de $2,800 MXN. No hay mensualidades ni cargos recurrentes.
¿Cuánto tiempo tengo acceso?
12 meses desde tu inscripción, 24/7, para avanzar a tu ritmo.
¿Quién imparte el contenido?
El curso es impartido por FastBit Embedded Brain Academy; INEC gestiona tu inscripción, evaluación y certificado.
¿Qué pasa cuando vence mi acceso?
Puedes renovar tu cuenta tú mismo desde la plataforma, sin trámites ni esperas.

