
Learn to build an e-commerce app with .Net Core and Angular
Build a proof of concept e-commerce store using Angular, .Net and Stripe for payment processing
Lo que serás capaz de hacer
*** This course has been updated for .Net 10 and Angular 21*** Have you learnt the basics of ASP.NET Core and Angular? Not sure where to go next? This course should be able to help with that. In this course we start from nothing and build a proof of concept E-Commerce store using these frameworks. In this course we build a complete application from start to finish and every line of code is demonstrated and explained. Here are some of the things you will learn about in this course: Setting up the developer environment Creating a multi project .net core application using the dotnet CLI Creating a client side front-end Angular UI for the store using the Angular CLI Learn how to use the Repository, Unit of Work and specification pattern in .net core Using multiple DbContext as context boundaries Using ASP.NET Identity for login and registration Using the angular modules to create lazy loaded routes. Building a great looking UI using Angular Material and Tailwind Making reusable form components using Angular Reactive forms Paging, Sorting, Searching and Filtering Using Redis to store the shopping basket Creating orders from the shopping basket Accepting payments via Stripe using the new EU standards for 3D secure Publishing the application to Azure SignalR Role based authentication Many more things as well Tools you need for this course In this course all the lessons are demonstrated using Visual Studio Code, a free cross platform code editor. You can of course use any IDE you like and any Operating system you like... as long as it's Windows, Linux or Mac. Is this course for you? This course is very practical, about 90%+ of the lessons will involve you coding along with me on this project. If you are the type of person who gets the most out of learning by doing, then this course is definitely for you. Important: If you have never coded before and you want to learn .Net and Angular you would be better starting with my other .Net Core and Angular course before this one. On this course we will build an example E-commerce store, completely from scratch using the DotNet CLI and the Angular CLI to help us get started. All you will need to get started is a computer with your favourite operating system, and a passion for learning how to build an application using ASP.NET Core and Angular.
- .Net Core
- Angular
- C# Generics
- Repository and Unit of Work Pattern
- Specification Pattern
- Caching
Temario
UNIDAD 1 - Introduction · 4 leccionesUNIDAD 1 - Introduction
UNIDAD 1 - Introduction
- Introduction to the course
- Setting up the developer environment
- Setting up VS Code for C# development
- Course assets and source code location
UNIDAD 2 - API Basics · 14 leccionesUNIDAD 2 - API Basics
UNIDAD 2 - API Basics
- Introduction
- Creating the .Net projects
- No solution explorer in C# dev kit
- Reviewing the projects in VS Code
- Creating the Product Entity
- Setting up entity framework
- Setting up Sql Server
- Connecting to the Sql Server from the app
- Configuring the entities for the migration
- Creating a products controller
- Using postman to test our new API Endpoints
- Adding the update and delete endpoints
- Saving our code into source control
- Summary
UNIDAD 3 - API Architecture · 10 leccionesUNIDAD 3 - API Architecture
UNIDAD 3 - API Architecture
- Introduction
- Introduction to the repository pattern
- Creating the repository interface and implementation class
- Implementing the repository methods
- Using the repository in the controller
- Seeding data
- Getting the brands and types
- Filtering the products by brand
- Sorting the products
- Summary
UNIDAD 4 - The specification pattern · 14 leccionesUNIDAD 4 - The specification pattern
UNIDAD 4 - The specification pattern
- Introduction
- Creating a generic repository
- Implementing the generic repository methods
- Using the generic repository in the controller
- Introduction to the specification pattern
- Setting up the specification classes
- Updating the repository to use the specification
- Using the specification pattern
- Adding sorting to the specification
- Using the debugger
- Adding projection to the spec part 1
- Adding projection to the spec part 2
- Adding projection to the spec part 3
- Summary
UNIDAD 5 - Sorting, Filtering, Searching & Pagination · 8 leccionesUNIDAD 5 - Sorting, Filtering, Searching & Pagination
UNIDAD 5 - Sorting, Filtering, Searching & Pagination
- Introduction
- Creating product spec parameters
- Adding pagination part 1
- Adding pagination part 2
- Adding pagination part 3
- Creating a Base API controller
- Adding the search functionality
- Summary
UNIDAD 6 - Error handling on the API · 6 leccionesUNIDAD 6 - Error handling on the API
UNIDAD 6 - Error handling on the API
- Introduction
- Adding a test controller for error handling
- Exception handling middleware
- Validation error responses
- Adding CORS support on the API
- Summary
UNIDAD 7 - Angular Setup · 7 leccionesUNIDAD 7 - Angular Setup
UNIDAD 7 - Angular Setup
- Introduction
- Creating the angular project
- Reviewing the Angular project files
- Using HTTPS with the Angular project
- Adding Angular Material and Tailwind CSS
- Adding VS Code extensions for Angular and Tailwind
- Summary
UNIDAD 8 - Angular Basics · 11 leccionesUNIDAD 8 - Angular Basics
UNIDAD 8 - Angular Basics
- Introduction
- Setting up the folder structure and creating components
- Adding a Header component
- Improving the header component
- Making http requests in Angular
- Introduction to observables
- Introduction to TypeScript
- Typescript demo
- Using Types in our Project
- Angular zoneless change detection
- Summary
UNIDAD 9 - Building the User Interface for the shop · 13 leccionesUNIDAD 9 - Building the User Interface for the shop
UNIDAD 9 - Building the User Interface for the shop
- Introduction
- Introduction to Angular services
- Designing the shop page
- Adding a product item component
- Getting the types and brands lists
- Adding the filtering functionality using Material Dialog
- Adding the filtering functionality using Material Dialog part 2
- Hooking up the filters to the service
- Adding the sorting functionality
- Using a class to supply the parameters for the API request
- Adding pagination to the client using Material
- Adding the search functionality to the client
- Summary
UNIDAD 10 - Angular Routing · 6 leccionesUNIDAD 10 - Angular Routing
UNIDAD 10 - Angular Routing
- Introduction
- Creating components and routes
- Setting up the links in the app
- Getting an individual product using Route params
- Designing the product details page
- Summary
UNIDAD 11 - Client side error handling and loading · 12 leccionesUNIDAD 11 - Client side error handling and loading
UNIDAD 11 - Client side error handling and loading
- Introduction
- Creating a test error component
- Creating a NotFound and Server Error component
- Creating an HTTP Interceptor for handling API errors
- Adding toast (snackbar) notifications
- Handling validation errors from the API
- Configuring the server error page
- Configuring the Not found page
- Adding an HTTP Interceptor for loading
- Adding a progress bar to indicate loading
- Making the header fixed to the top
- Summary
UNIDAD 12 - API - Shopping Cart · 8 leccionesUNIDAD 12 - API - Shopping Cart
UNIDAD 12 - API - Shopping Cart
- Introduction
- Creating a Redis instance to use in our app
- Using Redis with .Net
- Creating the Cart classes
- Creating a Cart service
- Creating the Cart controller
- Testing the Cart in Postman
- Summary
UNIDAD 13 - Client - Shopping Cart · 17 leccionesUNIDAD 13 - Client - Shopping Cart
UNIDAD 13 - Client - Shopping Cart
- Introduction
- Creating the cart components
- Introduction to Angular Signals
- Adding the Cart service methods
- Adding an item to the cart
- Using the add item functionality in the product item
- Persisting the cart
- Updating the nav bar with the cart item count
- Styling the cart
- Creating the order summary component
- Creating the order summary component part 2
- Creating the order totals
- Adding additional functions to the service
- Adding these functions to the cart
- Adding the update cart functionality to the product details
- Creating the checkout components
- Summary
UNIDAD 14 - API - Identity · 12 leccionesUNIDAD 14 - API - Identity
UNIDAD 14 - API - Identity
- Introduction
- Setting up identity
- Updating the DB and testing the endpoints
- Adding a custom register endpoint
- Testing the authentication
- Creating additional user endpoints
- Creating extension methods
- Validation errors
- Adding a user address class
- Adding an endpoint to update the user address
- Updating the user address part 2
- Summary
UNIDAD 15 - Client - Identity · 18 leccionesUNIDAD 15 - Client - Identity
UNIDAD 15 - Client - Identity
- Introduction
- Creating the account components
- Introduction to Angular forms
- Creating the login form
- Updating the header component
- Persisting the login
- Adding an auth interceptor
- Adding an Angular Material Menu
- Adding the register form
- Form validation part 1
- Form validation part 2
- Creating a re-usable text input
- Creating an auth guard
- Updating the auth guard to use observables
- Challenge - empty cart guard
- Challenge solution
- Adding an empty state component
- Summary
UNIDAD 16 - API & Client Checkout · 24 leccionesUNIDAD 16 - API & Client Checkout
UNIDAD 16 - API & Client Checkout
- Introduction
- Creating the delivery methods in the API
- Setting up Stripe
- Implementing the payment intent
- Creating a payment controller
- Checkout page layout
- Adding client side Stripe
- Creating the address element
- Populating the address in the address form
- Save the address as default address
- Creating the delivery component part 1
- Creating the delivery component part 2
- Creating the delivery component part 3
- Creating the payment element
- Creating the review component
- Stripe address auto complete functionality
- Validating step completion part 1
- Validating step completion part 2
- Creating a Stripe confirmation token
- Updating the review component with the token information
- Confirming the payment
- Loading and error notifications
- Checkout success page
- Summary
UNIDAD 17 - API - Orders · 14 leccionesUNIDAD 17 - API - Orders
UNIDAD 17 - API - Orders
- Introduction
- Creating the order aggregate part 1
- Creating the order aggregate part 2
- Configuring the order entities
- Introducing the Unit of work
- Implementing the unit of work
- Using the unit of work
- Creating the order controller
- Debugging the order creation
- Adding the get order methods
- Updating the spec for eager loading
- Updating the controller to eagerly load in the get methods
- Shaping the data to return
- Summary
UNIDAD 18 - Orders & Payments · 14 leccionesUNIDAD 18 - Orders & Payments
UNIDAD 18 - Orders & Payments
- Introduction
- Creating the order components
- Submitting the order
- Designing the order component to display orders
- Creating the order detailed page
- Updating the address pipe with type guards
- Adding a webhook endpoint in the payments controller
- Testing the WebHook using the Stripe CLI
- Adding SignalR to the API
- Adding SignalR to the client
- Updating the checkout success page
- Adding a guard to the checkout success
- Adding the home page component style
- Summary
UNIDAD 19 - Publishing to Azure · 13 leccionesUNIDAD 19 - Publishing to Azure
UNIDAD 19 - Publishing to Azure
- Introduction
- Preparing the client app for publishing
- Preparing the .Net app for publishing
- Setting up a cloud Redis server
- Setting up an azure account
- Configuring the web app on Azure
- Creating a Azure DB
- Publishing the app to Azure
- Adding Continuous integration
- Troubleshooting Azure issues
- Making the empty state component reusable
- Updating CI to also build the angular app
- Summary
UNIDAD 20 - The Coupon Challenge · 1 leccionesUNIDAD 20 - The Coupon Challenge
UNIDAD 20 - The Coupon Challenge
- Challenge - coupon challenge
UNIDAD 21 - Role based authorization · 16 leccionesUNIDAD 21 - Role based authorization
UNIDAD 21 - Role based authorization
- Introduction
- Adding roles to the app
- Using the roles
- Creating an admin controller
- Updating the Base controller CreatePagedResult method
- Adding refund functionality
- Creating the admin components
- Creating an angular directive
- Creating an admin route guard
- Adding the admin service methods
- Adding the admin component code
- Designing the admin component template
- Populating the orders table
- Adding the order table action button functionality
- Adding a confirmation prompt
- Summary
UNIDAD 22 - Performance · 7 leccionesUNIDAD 22 - Performance
UNIDAD 22 - Performance
- Introduction
- Setting up caching on the API
- Creating an attribute
- Testing the caching
- Invalidating the cache
- Lazy loading in angular
- End of course summary
UNIDAD 23 - Updating project to .Net 9, Angular 20, Tailwind 4 · 3 leccionesUNIDAD 23 - Updating project to .Net 9, Angular 20, Tailwind 4
UNIDAD 23 - Updating project to .Net 9, Angular 20, Tailwind 4
- Updating the .Net project to .Net 9
- Updating the Angular project to Angular 20
- Updating to Tailwind 4 and Angular Material 20
UNIDAD 24 - Updating project to .Net 10, Angular 21 + Zoneless Angular · 3 leccionesUNIDAD 24 - Updating project to .Net 10, Angular 21 + Zoneless Angular
UNIDAD 24 - Updating project to .Net 10, Angular 21 + Zoneless Angular
- Updating the .Net projects to .Net 10
- Updating the Angular project to Angular v21
- Refactoring the Angular project to use Zoneless change detection
UNIDAD 25 - Legacy version of the course · 1 leccionesUNIDAD 25 - Legacy version of the course
UNIDAD 25 - Legacy version of the course
- Legacy course
Tu certificado lo emite la SEP, no solo una plataforma
Al demostrar la competencia recibes un certificado emitido por la Secretaría de Educación Pública a través del Gobierno del Estado de México: un documento oficial que puedes presentar con confianza ante cualquier empleador o institución.
Tu certificado con INEC
- Lo emite la Secretaría de Educación Pública (SEP), a través del Gobierno del Estado de México
- Documento oficial con folio verificable en línea
- Lo otorga la Universidad Tecnológica Fidel Velázquez
Otras plataformas en línea
- Constancia privada emitida por la misma plataforma
- Solo acredita horas cursadas o asistencia
- Sin respaldo de una autoridad educativa
Tu itinerario, de la inscripción al certificado
- 1
Inscripción con pago único
Pagas $2,800 MXN una sola vez y entras de inmediato al curso.
- 2
Estudias a tu ritmo
25 unidades con videos, lecturas y actividades, disponibles 24/7 durante 12 meses.
- 3
Cuestionarios por unidad
Cuestionarios para comprobar lo aprendido.
- 4
Certificado
Emitido por la SEP a través del Gobierno del Estado de México, con folio verificable.
Un certificado oficial de la SEP
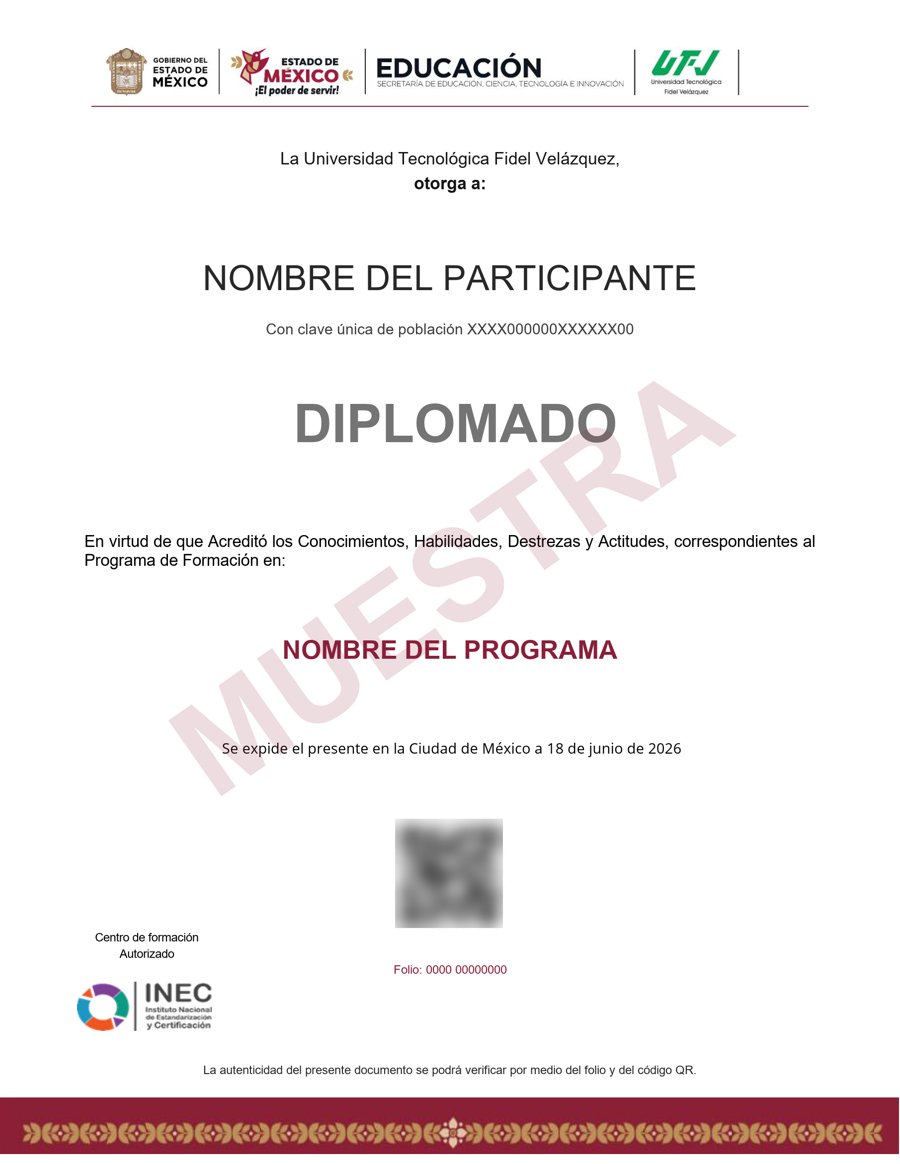
Muestra · verificable por folio y QR
- Emitido por la Secretaría de Educación Pública (SEP), a través del Gobierno del Estado de México. No es una constancia privada: es un documento oficial, y ese respaldo marca la diferencia frente a otras plataformas en línea.
- Contenido impartido por Neil Cummings.
- Folio y QR verificables para compartirlo con quien te contrate.
Empieza hoy, a tu ritmo
Un solo pago y acceso inmediato al curso completo durante 12 meses.
- 25 unidades · 256 lecciones · 60 h
- 12 meses de acceso
- Certificado emitido por la SEP (Gob. del Estado de México) con folio verificable
Sobre tu inscripción
¿Cómo es el pago?
Un solo pago de $2,800 MXN. No hay mensualidades ni cargos recurrentes.
¿Cuánto tiempo tengo acceso?
12 meses desde tu inscripción, 24/7, para avanzar a tu ritmo.
¿Quién imparte el contenido?
El curso es impartido por Neil Cummings; INEC gestiona tu inscripción, evaluación y certificado.
¿Qué pasa cuando vence mi acceso?
Puedes renovar tu cuenta tú mismo desde la plataforma, sin trámites ni esperas.

