
Learn Onshape for Beginners
Learn 3D CAD fast. Become confident in 3D design with this step by step course. Includes multiple design projects.
Lo que serás capaz de hacer
This course is ideal for beginners wanting to learn CAD. Onshape is one of the world’s most popular online CAD packages and is FREE for education and home use. Developed by the founders of Solidworks, Onshape is unique in that it is accessed through a web browser. There is no need to download any software, everything is access through a web browser. If you have an interest in designing your own 3D models then this course will teach you the skills. After the first couple of tutorials, you'll ve straight into 3D modeling with ease. There are 36 tutorials delivered by Phil Cotton, a High School Technology teacher in the UK, founder of learnbylayers and a certified CAD instructor. Phil has taught thousands of students and teachers the basics of 3D design. The course will build your skills from an absolute beginner, creating basic models to being confident in designing complex models, such as Iphone cases and Arduino cases. Topics covered include; Sketching 2D profiles and converting to 3D shapes Adding dimensions Projecting Sketches Extruding shapes Creating shells Adding fillets Adding holes Creating chamfers Offsetting workplanes Editing sketches Creating a section view Creating sweeps, revolves and lofts Designing models including brackets, vases, lampshade, iphones, iphone cases, door signs and Arduino cases. This course will build your skills in creating 3D designs and will teach you a range of tips and tricks to designing 3D models.
- CAD
- Design
- 3D modelling
- 3D design
- Parametric modelling
- modelling
Temario
UNIDAD 1 - Introduction - Onshape walk through · 1 leccionesUNIDAD 1 - Introduction - Onshape walk through
UNIDAD 1 - Introduction - Onshape walk through
- Introduction
UNIDAD 2 - Lesson 2 - How to create a basic sketch · 1 leccionesUNIDAD 2 - Lesson 2 - How to create a basic sketch
UNIDAD 2 - Lesson 2 - How to create a basic sketch
- How to create a basic 3D shape.
UNIDAD 3 - Lesson 3 - How to add fillets and holes · 1 leccionesUNIDAD 3 - Lesson 3 - How to add fillets and holes
UNIDAD 3 - Lesson 3 - How to add fillets and holes
- How to add fillets and a hole
UNIDAD 4 - Lesson 4 - How to pattern holes · 1 leccionesUNIDAD 4 - Lesson 4 - How to pattern holes
UNIDAD 4 - Lesson 4 - How to pattern holes
- Lesson 4 - Patterning holes
UNIDAD 5 - Lesson 5 - Adding text to a model · 1 leccionesUNIDAD 5 - Lesson 5 - Adding text to a model
UNIDAD 5 - Lesson 5 - Adding text to a model
- Adding text to a model
UNIDAD 6 - Lesson 6 - How to export a file for 3D printing · 1 leccionesUNIDAD 6 - Lesson 6 - How to export a file for 3D printing
UNIDAD 6 - Lesson 6 - How to export a file for 3D printing
- Export as an STL file
UNIDAD 7 - Lesson 7 - Editing sketches · 1 leccionesUNIDAD 7 - Lesson 7 - Editing sketches
UNIDAD 7 - Lesson 7 - Editing sketches
- Introduction to editing sketches
UNIDAD 8 - Lesson 8 - Sketching a fidget spinner · 1 leccionesUNIDAD 8 - Lesson 8 - Sketching a fidget spinner
UNIDAD 8 - Lesson 8 - Sketching a fidget spinner
- Sketching a fidget spinner
UNIDAD 9 - Lesson 9 - Extruding and adding a chamfer · 1 leccionesUNIDAD 9 - Lesson 9 - Extruding and adding a chamfer
UNIDAD 9 - Lesson 9 - Extruding and adding a chamfer
- Adding chamfers and extruding
UNIDAD 10 - Lesson 10 - Adding workplanes · 1 leccionesUNIDAD 10 - Lesson 10 - Adding workplanes
UNIDAD 10 - Lesson 10 - Adding workplanes
- Adding workplanes using the offset feature
UNIDAD 11 - Lesson 11 - Adding a stopped to the fidget spinner · 1 leccionesUNIDAD 11 - Lesson 11 - Adding a stopped to the fidget spinner
UNIDAD 11 - Lesson 11 - Adding a stopped to the fidget spinner
- Adding a stopped to the fidget spinner
UNIDAD 12 - Lesson 12 - How to create a basic revolve · 1 leccionesUNIDAD 12 - Lesson 12 - How to create a basic revolve
UNIDAD 12 - Lesson 12 - How to create a basic revolve
- How to create a basic 3D revolve.
UNIDAD 13 - Lesson 13 - How to model a vase using the revolve feature · 1 leccionesUNIDAD 13 - Lesson 13 - How to model a vase using the revolve feature
UNIDAD 13 - Lesson 13 - How to model a vase using the revolve feature
- Designing a vase
UNIDAD 14 - Lesson 14 - How to edit a revolve · 1 leccionesUNIDAD 14 - Lesson 14 - How to edit a revolve
UNIDAD 14 - Lesson 14 - How to edit a revolve
- How to edit a sketch on a revolve
UNIDAD 15 - Lesson 15 - How to sketch a lampshade in 3D · 1 leccionesUNIDAD 15 - Lesson 15 - How to sketch a lampshade in 3D
UNIDAD 15 - Lesson 15 - How to sketch a lampshade in 3D
- How to sketch the profile of a lampshade
UNIDAD 16 - Lesson 16 - Sketching a design to cut out · 1 leccionesUNIDAD 16 - Lesson 16 - Sketching a design to cut out
UNIDAD 16 - Lesson 16 - Sketching a design to cut out
- Sketching a design to cut out
UNIDAD 17 - Lesson 17 - How to pattern a feature on a curved surface · 1 leccionesUNIDAD 17 - Lesson 17 - How to pattern a feature on a curved surface
UNIDAD 17 - Lesson 17 - How to pattern a feature on a curved surface
- Patterning a feature on a curved surface
UNIDAD 18 - Lesson 18 - Adding a hole for a light fitting · 1 leccionesUNIDAD 18 - Lesson 18 - Adding a hole for a light fitting
UNIDAD 18 - Lesson 18 - Adding a hole for a light fitting
- Adding a hole to the lampshade
UNIDAD 19 - Lesson 19 - How to create a sweep · 1 leccionesUNIDAD 19 - Lesson 19 - How to create a sweep
UNIDAD 19 - Lesson 19 - How to create a sweep
- Creating a sweep
UNIDAD 20 - Lesson 20 - How to sketch and edit a profile and then sweep · 1 leccionesUNIDAD 20 - Lesson 20 - How to sketch and edit a profile and then sweep
UNIDAD 20 - Lesson 20 - How to sketch and edit a profile and then sweep
- Sweeping a slide profile
UNIDAD 21 - Lesson 21 - How to design a paper clip task · 1 leccionesUNIDAD 21 - Lesson 21 - How to design a paper clip task
UNIDAD 21 - Lesson 21 - How to design a paper clip task
- How to design a paperclip using the sweep command
UNIDAD 22 - Lesson 22 - How to use the loft feature · 1 leccionesUNIDAD 22 - Lesson 22 - How to use the loft feature
UNIDAD 22 - Lesson 22 - How to use the loft feature
- Lofting profiles
UNIDAD 23 - Lesson 23 - How to model a tea light holder · 1 leccionesUNIDAD 23 - Lesson 23 - How to model a tea light holder
UNIDAD 23 - Lesson 23 - How to model a tea light holder
- How to model a tea light holder using the loft feature.
UNIDAD 24 - Lesson 24 - How to model a wall bracket · 1 leccionesUNIDAD 24 - Lesson 24 - How to model a wall bracket
UNIDAD 24 - Lesson 24 - How to model a wall bracket
- Bracket tutorial
UNIDAD 25 - Lesson 25 - How to model the profile of an iphone · 1 leccionesUNIDAD 25 - Lesson 25 - How to model the profile of an iphone
UNIDAD 25 - Lesson 25 - How to model the profile of an iphone
- Sketching an iphone profile
UNIDAD 26 - Lesson 26 - How to insert and calibrate a decal. · 1 leccionesUNIDAD 26 - Lesson 26 - How to insert and calibrate a decal.
UNIDAD 26 - Lesson 26 - How to insert and calibrate a decal.
- Inserting a decal.
UNIDAD 27 - Lesson 27 - How to add features and buttons. · 1 leccionesUNIDAD 27 - Lesson 27 - How to add features and buttons.
UNIDAD 27 - Lesson 27 - How to add features and buttons.
- Adding features and buttons.
UNIDAD 28 - Lesson 28 - Adding Cameras and charge ports · 1 leccionesUNIDAD 28 - Lesson 28 - Adding Cameras and charge ports
UNIDAD 28 - Lesson 28 - Adding Cameras and charge ports
- Adding cameras and charging port
UNIDAD 29 - Lesson 29 - How to design an iphone case · 1 leccionesUNIDAD 29 - Lesson 29 - How to design an iphone case
UNIDAD 29 - Lesson 29 - How to design an iphone case
- Designing the bumper of an iphone case
UNIDAD 30 - Lesson 30 - Adding the back of the iphone case · 1 leccionesUNIDAD 30 - Lesson 30 - Adding the back of the iphone case
UNIDAD 30 - Lesson 30 - Adding the back of the iphone case
- Adding the back of the iphone case
UNIDAD 31 - Lesson 31 - Adding cut-outs for chargers · 1 leccionesUNIDAD 31 - Lesson 31 - Adding cut-outs for chargers
UNIDAD 31 - Lesson 31 - Adding cut-outs for chargers
- Adding cut outs for chargers
UNIDAD 32 - Lesson 32 - Adding a pattern to the back of the case. · 1 leccionesUNIDAD 32 - Lesson 32 - Adding a pattern to the back of the case.
UNIDAD 32 - Lesson 32 - Adding a pattern to the back of the case.
- Adding a pattern to the case
UNIDAD 33 - Lesson 33 - How to model an Arduino case introduction · 1 leccionesUNIDAD 33 - Lesson 33 - How to model an Arduino case introduction
UNIDAD 33 - Lesson 33 - How to model an Arduino case introduction
- Arduino case introduction
UNIDAD 34 - Lesson 34 - How to model an Arduino case · 1 leccionesUNIDAD 34 - Lesson 34 - How to model an Arduino case
UNIDAD 34 - Lesson 34 - How to model an Arduino case
- Case tutorial
UNIDAD 35 - lesson 35 - How to model the lid · 1 leccionesUNIDAD 35 - lesson 35 - How to model the lid
UNIDAD 35 - lesson 35 - How to model the lid
- How to model a snap fit lid for the case.
UNIDAD 36 - Lesson 36 - How to create a section view · 1 leccionesUNIDAD 36 - Lesson 36 - How to create a section view
UNIDAD 36 - Lesson 36 - How to create a section view
- How to create a section view.
Tu certificado lo emite la SEP, no solo una plataforma
Al demostrar la competencia recibes un certificado emitido por la Secretaría de Educación Pública a través del Gobierno del Estado de México: un documento oficial que puedes presentar con confianza ante cualquier empleador o institución.
Tu certificado con INEC
- Lo emite la Secretaría de Educación Pública (SEP), a través del Gobierno del Estado de México
- Documento oficial con folio verificable en línea
- Lo otorga la Universidad Tecnológica Fidel Velázquez
Otras plataformas en línea
- Constancia privada emitida por la misma plataforma
- Solo acredita horas cursadas o asistencia
- Sin respaldo de una autoridad educativa
Tu itinerario, de la inscripción al certificado
- 1
Inscripción con pago único
Pagas $2,800 MXN una sola vez y entras de inmediato al curso.
- 2
Estudias a tu ritmo
36 unidades con videos, lecturas y actividades, disponibles 24/7 durante 12 meses.
- 3
Cuestionarios por unidad
Cuestionarios para comprobar lo aprendido.
- 4
Certificado
Emitido por la SEP a través del Gobierno del Estado de México, con folio verificable.
Un certificado oficial de la SEP
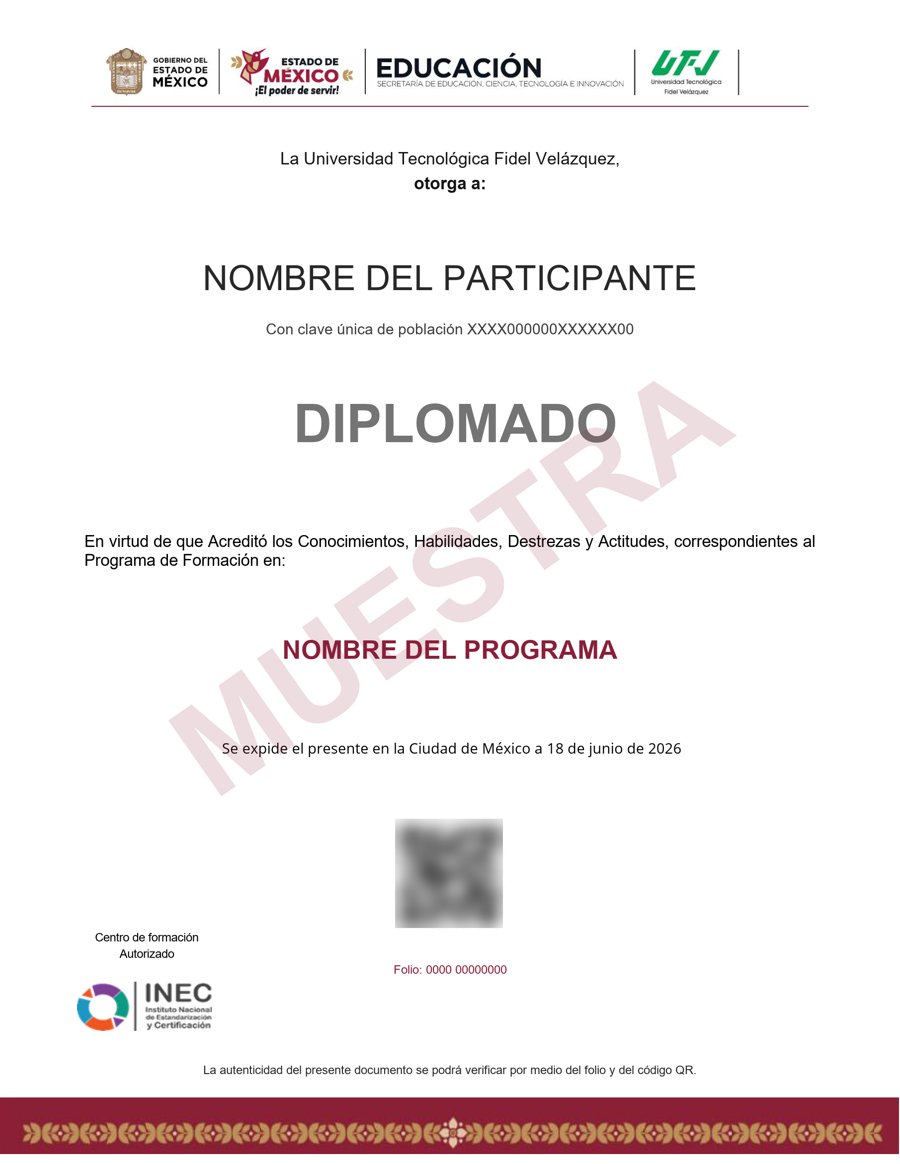
Muestra · verificable por folio y QR
- Emitido por la Secretaría de Educación Pública (SEP), a través del Gobierno del Estado de México. No es una constancia privada: es un documento oficial, y ese respaldo marca la diferencia frente a otras plataformas en línea.
- Contenido impartido por Philip Cotton.
- Folio y QR verificables para compartirlo con quien te contrate.
Empieza hoy, a tu ritmo
Un solo pago y acceso inmediato al curso completo durante 12 meses.
- 36 unidades · 36 lecciones · 60 h
- 12 meses de acceso
- Certificado emitido por la SEP (Gob. del Estado de México) con folio verificable
Sobre tu inscripción
¿Cómo es el pago?
Un solo pago de $2,800 MXN. No hay mensualidades ni cargos recurrentes.
¿Cuánto tiempo tengo acceso?
12 meses desde tu inscripción, 24/7, para avanzar a tu ritmo.
¿Quién imparte el contenido?
El curso es impartido por Philip Cotton; INEC gestiona tu inscripción, evaluación y certificado.
¿Qué pasa cuando vence mi acceso?
Puedes renovar tu cuenta tú mismo desde la plataforma, sin trámites ni esperas.

