
2026 Complete Course
Arduino Step by Step | Robotics | Hands-on | Arduino Projects | Home Automation | Arduino Programming
Lo que serás capaz de hacer
You are learning Arduino from scratch, and you don’t know where to start? Or… you already have an Arduino board but you feel stuck? At the end of this complete course, you will have a strong Arduino foundation, and you will be able to start any custom Arduino project you want. I will take you from a complete beginner - starting from scratch - to a confident Arduino Maker. And to get started with the course, NO need to know anything about Arduino, programming, hardware, or engineering. I will teach you everything, step by step, starting from zero. You just need the motivation to learn Arduino. → Why this course? When I look at the online resources to learn Arduino, I see many tutorials and courses who just explain the final result of a project, and focus on making you run this project as quickly as possible, to make you feel you’ve made great progress. The reality is that if you’ve just scratched the surface, and then good luck for creating a new project on your own. No cover of the basics, jumping to advanced or even unrelated hardware concepts, and no hands-on demonstration of how it works. I’ve created this course so you can really understand what you’re doing . You can start from scratch and get the necessary foundation you need, and learn - through practice and hands-on lessons - the complete process to create Arduino projects. Also, with over 100 000 students on the platform and 25 000 reviews over 4.7/5 , I’ve had the time to experiment a lot and find what works better to teach efficiently. And I’m not just teaching Arduino without real experience with it. As an example, a few years ago I used the Arduino environment to create a complete 6 axis robotic arm, now sold in the market as a real product. This was a real challenge and this made me develop a practical mindset , as well as understand what is really important to learn, and in what order. This course is the result of many years of learning, practice, development of real commercial products, and teaching. → How will you learn, how do I teach? Quite simple. First: Focus on the why first Hands-on lessons Step by step progress Complete explanations, No copy and paste And then: Many challenges for you to practice (20 activities) and make you think . A big final project to practice more and make the link between every functionality/concepts you’ve seen in the course. This course is focused on the practical side , and has a clear and ordered structure . Each new learning block is built on the previous ones. No jumping around concepts in an unordered way! And no crap to make the course longer, no useless and distracting stuff. I go to the point to teach you what you really need to learn now, to be able to create your own projects. → What will you do and learn in the course? The course is divided into 4 main parts: First you will set up the Arduino IDE (or the free online simulator), create your own circuit, learn the Arduino programming fundamentals, understand and work with digital/analog pins, to control LEDs, push buttons, potentiometers. After this “basic Arduino foundation” package, time to get to know new Arduino functionalities to go further with your projects: time, multitasking, debounce, interrupts, Serial, EEPROM. Now you’ll be really more confident to create any Arduino program or project. Here you will work with new hardware components, such as an ultrasonic sensor, LCD display screen, infrared remote controller, photoresistor. And to finish, a big final project: an interactive obstacle detection application. You will get a nice challenge to create a real and useful Arduino project, that you can reuse and modify for your own purpose. Bonus point: you can complete the course with just a free online simulation tool, no hardware needed if you don’t want to. For each section (20), to make it easier to progress, you’ll find: Hands-on circuit setup for new components, both with the simulation and the real components. If needed, a quick and to-the-point visual explanation of a new concept/functionality. Hands-on lessons to experiment directly with the concepts/functionalities/components. Mini projects (that I call activities) to put into practice what you’ve just seen, to make you think in a challenging way, and to make the link between the current and previous sections of the course. So, you want to learn Arduino in a fun, practical and efficient way? Don’t wait anymore and start your Arduino journey with this complete course today! Not only will you get a great Arduino foundation to start any Arduino project with confidence, but you will also: Become more autonomous and rely less on what you may (or may not) find on the Internet. Develop engineer-level thinking skills to solve any technical problem. Learn best practices from the start. Oh, and you also get a 30 days money-back guarantee if you’re not fully satisfied - no questions asked :) See you in the course! Note - This course is not for you if: You’re already at an advanced level with your Arduino. You just want a copy/paste solution to your problems.
- Master your Arduino, starting from scratch
- Become confident to create your own Arduino projects
- Create an interactive obstacle detection application
- Build your own Arduino circuit with many hardware components
- Program the Arduino with C/C++
- Create an online simulation of the course project
Temario
UNIDAD 1 - Introduction · 5 leccionesUNIDAD 1 - Introduction
UNIDAD 1 - Introduction
- Welcome!
- What is Arduino?
- List of Materials for this Course + Recommendations
- Online Simulation - Quick Overview
- How to get the most out of this course
UNIDAD 2 - Install and Setup Arduino IDE + Tinkercad Simulation · 5 leccionesUNIDAD 2 - Install and Setup Arduino IDE + Tinkercad Simulation
UNIDAD 2 - Install and Setup Arduino IDE + Tinkercad Simulation
- Intro
- Install the Arduino IDE on your Computer
- Customize your Arduino IDE for Better Readability
- Connect your Arduino board and Find it on the Arduino IDE
- Simulation - Create a Tinkercad account + How to Get Started
UNIDAD 3 - Your First Arduino Project · 8 leccionesUNIDAD 3 - Your First Arduino Project
UNIDAD 3 - Your First Arduino Project
- Intro
- Arduino Setup and Loop Functions
- Your First Arduino Project: Make an LED Blink
- Debug Your Projects with the Serial Monitor
- How to Restart your Arduino Program (Different ways)
- Simulation - Your First Program + Debug + Restart
- Activity 01- Change the LED Blink Rate, and Print a Message when it Turns on/off
- Activity 01 - Solution
UNIDAD 4 - Create an Arduino circuit · 6 leccionesUNIDAD 4 - Create an Arduino circuit
UNIDAD 4 - Create an Arduino circuit
- Intro
- Understand How a Breadboard Works
- Decrypt the Color Code From Resistors
- Quick Recommendations on Hardware Manipulation - PLEASE WATCH
- Create a Circuit with 1 LED and 1 Resistor
- Make your new LED Blink
UNIDAD 5 - Programming Basics for Arduino · 9 leccionesUNIDAD 5 - Programming Basics for Arduino
UNIDAD 5 - Programming Basics for Arduino
- Intro
- Variables
- Data Types
- Functions
- Scope
- Conditions
- Loops
- Arrays
- Recap
UNIDAD 6 - LEDs - Digital Pins as Output Pins · 7 leccionesUNIDAD 6 - LEDs - Digital Pins as Output Pins
UNIDAD 6 - LEDs - Digital Pins as Output Pins
- Intro
- How Digital Pins Work as Output Pins
- Set a Digital Value - Power on an LED
- How Digital Pins Work with Analog Values (PWM)
- Set an Analog Value - Change the Brightness of an LED
- Activity 02- Make an LED Fade in/out
- Activity 02 - Solution
UNIDAD 7 - Push Button - Digital Pins as Input Pins · 7 leccionesUNIDAD 7 - Push Button - Digital Pins as Input Pins
UNIDAD 7 - Push Button - Digital Pins as Input Pins
- Intro
- Add a Push Button to Your Circuit
- How Digital Pins Work as Input Pins
- Read a Digital Value - Detect When the Button is Pressed
- Activity 03 - Power on an LED Only if the Button is Pressed
- Activity 03 - Solution
- A Nice Additional Tool to Visualize Data on the Arduino IDE - Serial Plotter
UNIDAD 8 - Potentiometer - Analog Pins · 7 leccionesUNIDAD 8 - Potentiometer - Analog Pins
UNIDAD 8 - Potentiometer - Analog Pins
- Intro
- Add a Potentiometer to Your Circuit
- How Analog Pins Work
- Read an Analog Value From the Potentiometer
- Activity 04 - Set the LED Brightness with the Potentiometer
- Activity 04 - Solution
- Extra: Use an Analog Pin as a Digital Pin
UNIDAD 9 - Practice More with Arduino Pins · 8 leccionesUNIDAD 9 - Practice More with Arduino Pins
UNIDAD 9 - Practice More with Arduino Pins
- Intro - Arduino Pins Recap
- Add 2 More LEDs to Your Circuit
- Activity 05 - Create a Small Traffic Light System
- Activity 05 - Solution
- Activity 06 - Blink 3 LEDs When the Button is not Pressed
- Activity 06 - Solution
- Activity 07 - Improve The Previous Project with Functions and Arrays
- Activity 07 - Solution
UNIDAD 10 - Serial Communication - Send and Receive Data · 6 leccionesUNIDAD 10 - Serial Communication - Send and Receive Data
UNIDAD 10 - Serial Communication - Send and Receive Data
- Intro
- Send Data with Serial
- Receive Data with Serial
- Change Serial Baud Rate for Faster Communication
- Activity 08 - Set an LED Blink Rate from the Serial Monitor
- Activity 08 - Solution
UNIDAD 11 - Time Functionalities - Improve Your Programs and Multitask · 11 leccionesUNIDAD 11 - Time Functionalities - Improve Your Programs and Multitask
UNIDAD 11 - Time Functionalities - Improve Your Programs and Multitask
- Intro
- Pause the Execution with delay() and delayMicroseconds()
- The Problem with delay()
- Get the Time with millis() and micros()
- Compute the Duration of an Action
- The Solution to Avoid Using delay()
- Blink Multiple LEDs without delay()
- Activity 09 - Re-write the Previous Activity on Serial without delay()
- Activity 09 - Solution
- Activity 10 - Multitask: Run 3 Actions Simultaneously
- Activity 10 - Solution
UNIDAD 12 - Debounce the Push Button · 6 leccionesUNIDAD 12 - Debounce the Push Button
UNIDAD 12 - Debounce the Push Button
- Intro
- The Bounce Problem - Experiment
- The Bounce Problem - Explanation
- Debounce the Push Button
- Activity 11 - Toggle a Different LED when Pressing on the Button
- Activity 11 - Solution
UNIDAD 13 - Arduino Interrupts · 7 leccionesUNIDAD 13 - Arduino Interrupts
UNIDAD 13 - Arduino Interrupts
- Intro
- What are Interrupts, When to Use Them
- Set up an Interrupt in Your Program
- Software Debounce Inside an Interrupt
- Warnings About Interrupts - When to use/not to use
- Activity 12 - Count How Many Times you Press on the Push Button with Interrupts
- Activity 12 - Solution
UNIDAD 14 - EEPROM - Save Values on the Arduino · 5 leccionesUNIDAD 14 - EEPROM - Save Values on the Arduino
UNIDAD 14 - EEPROM - Save Values on the Arduino
- Intro
- What is EEPROM, When to Use it
- Save and Retrieve Values with EEPROM
- Activity 13 - Save an LED Max Brightness for the Next Program Run
- Activity 13 - Solution
UNIDAD 15 - Ultrasonic Sensor - Measure Distances · 10 leccionesUNIDAD 15 - Ultrasonic Sensor - Measure Distances
UNIDAD 15 - Ultrasonic Sensor - Measure Distances
- Intro
- Add the Ultrasonic Sensor to Your Circuit
- How the Ultrasonic Sensor Works + pulseIn() function
- Get the Distance From an Obstacle
- Activity 14 - Measure the Duration of the pulseIn() Function
- Activity 14 - Solution
- Use the Ultrasonic Sensor with Interrupts Instead of pulseIn()
- Activity 15 - Power on a Different LED Depending on the Distance From an Obstacl
- Activity 15 - Solution
- Extra - Improve the Stability of the Ultrasonic Sensor
UNIDAD 16 - LCD Screen - Display Text Directly on Your Circuit/Robot · 8 leccionesUNIDAD 16 - LCD Screen - Display Text Directly on Your Circuit/Robot
UNIDAD 16 - LCD Screen - Display Text Directly on Your Circuit/Robot
- Intro
- Add the LCD Screen to Your Circuit
- Print Text on the LCD Screen + Tune it with the Potentiometer
- Play with the LCD Cursor
- Activity 16 - Print Serial Input on LCD Screen
- Activity 16 - Solution
- Activity 17 - Print Distance From Obstacle on LCD Screen
- Activity 17 - Solution
UNIDAD 17 - IR Remote Controller - Make Your Projects More Interactive · 10 leccionesUNIDAD 17 - IR Remote Controller - Make Your Projects More Interactive
UNIDAD 17 - IR Remote Controller - Make Your Projects More Interactive
- Intro
- Add the IR Receiver to Your Circuit
- Install a new Arduino Library with the Arduino IDE
- Get Data From the IR Remote Controller (Library v2)
- Change Library Version (v3) and Get Data From the IR Remote Controller
- Map the Data You Read with the Controller’s Buttons
- Use a Switch Structure to Handle IR Commands
- Activity 18 - Choose which LED to Power on with the Remote Controller
- Activity 18 - Solution (Part A)
- Activity 18 - Solution (Part B)
UNIDAD 18 - Photoresistor - Measure Luminosity · 7 leccionesUNIDAD 18 - Photoresistor - Measure Luminosity
UNIDAD 18 - Photoresistor - Measure Luminosity
- Intro
- Add the Photoresistor to Your Circuit
- Read the Luminosity from the Photoresistor
- Activity 19 - Power on LEDs if it’s Getting too Dark
- Activity 19 - Solution
- Activity 20 - Compute the Average Luminosity Over a Period of Time
- Activity 20 - Solution
UNIDAD 19 - Final project - Interactive Obstacle Detection · 15 leccionesUNIDAD 19 - Final project - Interactive Obstacle Detection
UNIDAD 19 - Final project - Interactive Obstacle Detection
- Intro - Project Overview and Final Result
- Step 1 - Get Distance with Ultrasonic Sensor
- Step 2 - Change LED Blink Rate Depending on the Distance
- Step 3 - Lock the Application When an Obstacle is Detected
- Step 4 - Unlock the App with the Debounced Push Button
- Step 5 - LCD Setup and Welcome Message
- Step 6 - Print Distance and Warning Message on LCD Screen
- Step 7 - Setup IR Remote Controller and Map Buttons
- Step 8 - Unlock the App when Pressing on the Play Button
- Step 9 - Change and Save (EEPROM) the Distance Unit
- Step 10 - Switch Between Different LCD Screens and Reset Settings
- Step 11 - Print Luminosity and Adjust the Lighting from the Photoresistor
- Simulation - Code with Version 2 of the IR remote Library
- Project Conclusion - Going Further
- Tips and Best Practices to Create Your Own Arduino Project
UNIDAD 20 - Conclusion · 3 leccionesUNIDAD 20 - Conclusion
UNIDAD 20 - Conclusion
- What You’ve Learned
- What to do next
- Bonus Lecture
Tu certificado lo emite la SEP, no solo una plataforma
Al demostrar la competencia recibes un certificado emitido por la Secretaría de Educación Pública a través del Gobierno del Estado de México: un documento oficial que puedes presentar con confianza ante cualquier empleador o institución.
Tu certificado con INEC
- Lo emite la Secretaría de Educación Pública (SEP), a través del Gobierno del Estado de México
- Documento oficial con folio verificable en línea
- Lo otorga la Universidad Tecnológica Fidel Velázquez
Otras plataformas en línea
- Constancia privada emitida por la misma plataforma
- Solo acredita horas cursadas o asistencia
- Sin respaldo de una autoridad educativa
Tu itinerario, de la inscripción al certificado
- 1
Inscripción con pago único
Pagas $2,800 MXN una sola vez y entras de inmediato al curso.
- 2
Estudias a tu ritmo
20 unidades con videos, lecturas y actividades, disponibles 24/7 durante 12 meses.
- 3
Cuestionarios por unidad
Cuestionarios para comprobar lo aprendido.
- 4
Certificado
Emitido por la SEP a través del Gobierno del Estado de México, con folio verificable.
Un certificado oficial de la SEP
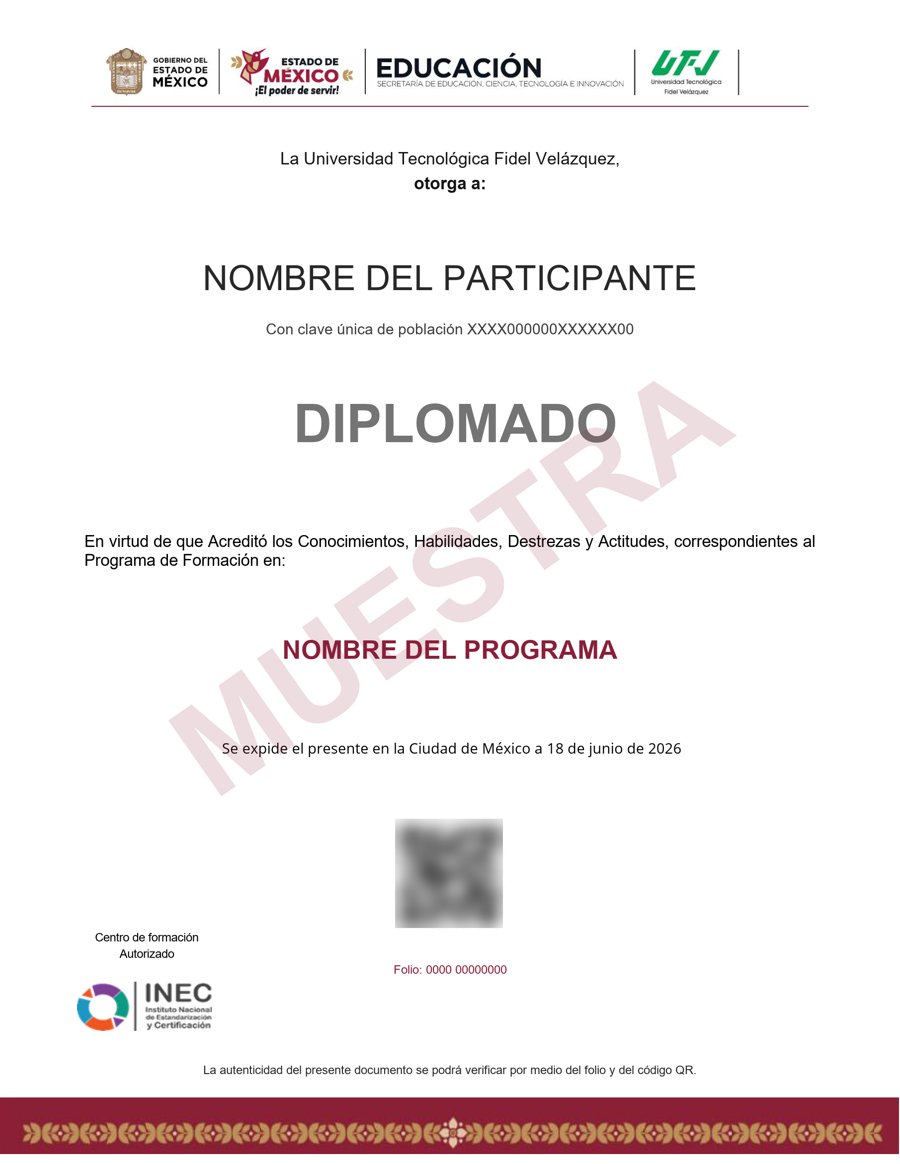
Muestra · verificable por folio y QR
- Emitido por la Secretaría de Educación Pública (SEP), a través del Gobierno del Estado de México. No es una constancia privada: es un documento oficial, y ese respaldo marca la diferencia frente a otras plataformas en línea.
- Contenido impartido por Edouard Renard.
- Folio y QR verificables para compartirlo con quien te contrate.
Empieza hoy, a tu ritmo
Un solo pago y acceso inmediato al curso completo durante 12 meses.
- 20 unidades · 150 lecciones · 60 h
- 12 meses de acceso
- Certificado emitido por la SEP (Gob. del Estado de México) con folio verificable
Sobre tu inscripción
¿Cómo es el pago?
Un solo pago de $2,800 MXN. No hay mensualidades ni cargos recurrentes.
¿Cuánto tiempo tengo acceso?
12 meses desde tu inscripción, 24/7, para avanzar a tu ritmo.
¿Quién imparte el contenido?
El curso es impartido por Edouard Renard; INEC gestiona tu inscripción, evaluación y certificado.
¿Qué pasa cuando vence mi acceso?
Puedes renovar tu cuenta tú mismo desde la plataforma, sin trámites ni esperas.

